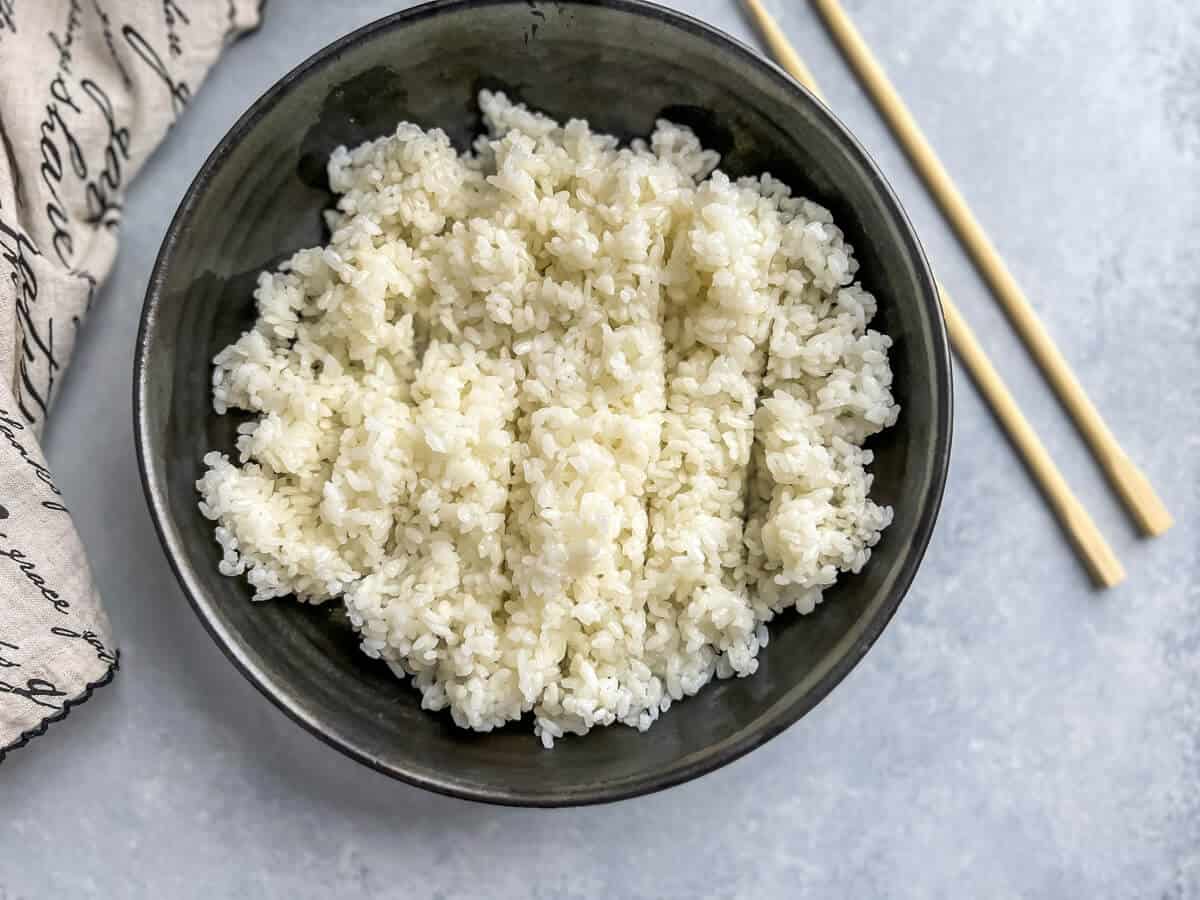
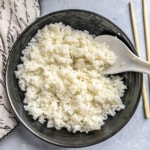
This easy Instant Pot sushi rice recipe makes fluffy, sticky, and shiny restaurant-style rice in under 20 minutes! This delicately seasoned pressure cooker rice is perfect as a base for homemade sushi rolls and bowls.

Want to save this post for later?
If you love sushi rolls, you know that the key to making a perfect roll is getting the rice right. The rice needs to be shiny, plump, perfectly seasoned, and sticky to hold it all together.
Cooking the perfect sushi rice may sound tricky and hard, but not anymore. Thanks to the Instant Pot, it's easy to make the best sushi rice right at home!
Like my other pressure cooker rice recipes (Instant Pot Basmati and sona masoori, to name a few), this Instant Pot sushi rice recipe requires only a handful of simple ingredients that you can easily find in your local Asian grocery store.
In less than 20 minutes, you'll have plumped-up cooked rice ready to fluff and combine with a simple but fragrant blend of sugar, salt, and rice vinegar. Bonus: Much of that time is hands-off, so you can set the appliance and walk away to take care of other dishes.
What makes sushi rice different
The big difference between sushi rice vs. white rice is that the former is not just rice.
White rice refers to any short or long-grain rice. It becomes sushi rice after being seasoned with a combination of rice vinegar, salt, and sugar. This gives the sushi rice its distinct flavor and sticky texture.
Alternate names include japonita, shari
Recommended rice varieties
This recipe has been adapted from Namiko's blog - Just one cookbook. Her blog is a treasure trove for Japanese recipes. She recommends the following varieties of rice to make sushi rice -
Fun fact: Did you know sushi rice and sticky rice (glutinous rice) are not the same? Sushi rice is used to make savory meals such as sushi, whereas glutinous rice is primarily used to make mochi (rice cakes), dumplings, and mango sticky rice. Learn more about the differences here.
Sushi rice vs. Jasmine rice
Like sushi rice vs. white rice, the only differences are the grain size and how the rice is treated after cooking.
Jasmine rice is a long-grain white rice that is served after being cooked. Often it's included with east-Asian dishes like Thai basil chicken or Indo-Chinese fried rice. Sushi rice, on the other hand, is seasoned after it is cooked, which is what gives it a distinct, sticky texture along with a sweet and tangy taste.
Where to buy
Japanese short-grained rice is labeled as sushi rice, and you can find it in most Asian grocery stores. Here's a link to buy it from Amazon.
Seasoning rice with vinegar
The history of sushi rice is quite interesting! Various types of white rice have long been used in Asian recipes. Short-grain rice is most common in Japan and has been an integral part of making sushi as far back as the 4th century AD.
It is estimated that in the mid-1300s, the technique of adding a vinegar mixture to the rice was developed. This was to help keep the raw fish from spoiling so quickly, but since this mixture added so much flavor, its usage has continued even after refrigerators became common household appliances.
Why this recipe works
White rice is a great side dish staple: It's inexpensive, quick, easy to prepare, and reliably tasty. This Instant Pot sushi rice recipe checks all the boxes and is also super versatile!
- No need to buy a rice cooker - Cook it in your Instant Pot!
- Hands-free recipe - Add the rinsed rice and let the Instant Pot work it is magic.
- Quick and easy - It takes less than 30 minutes!
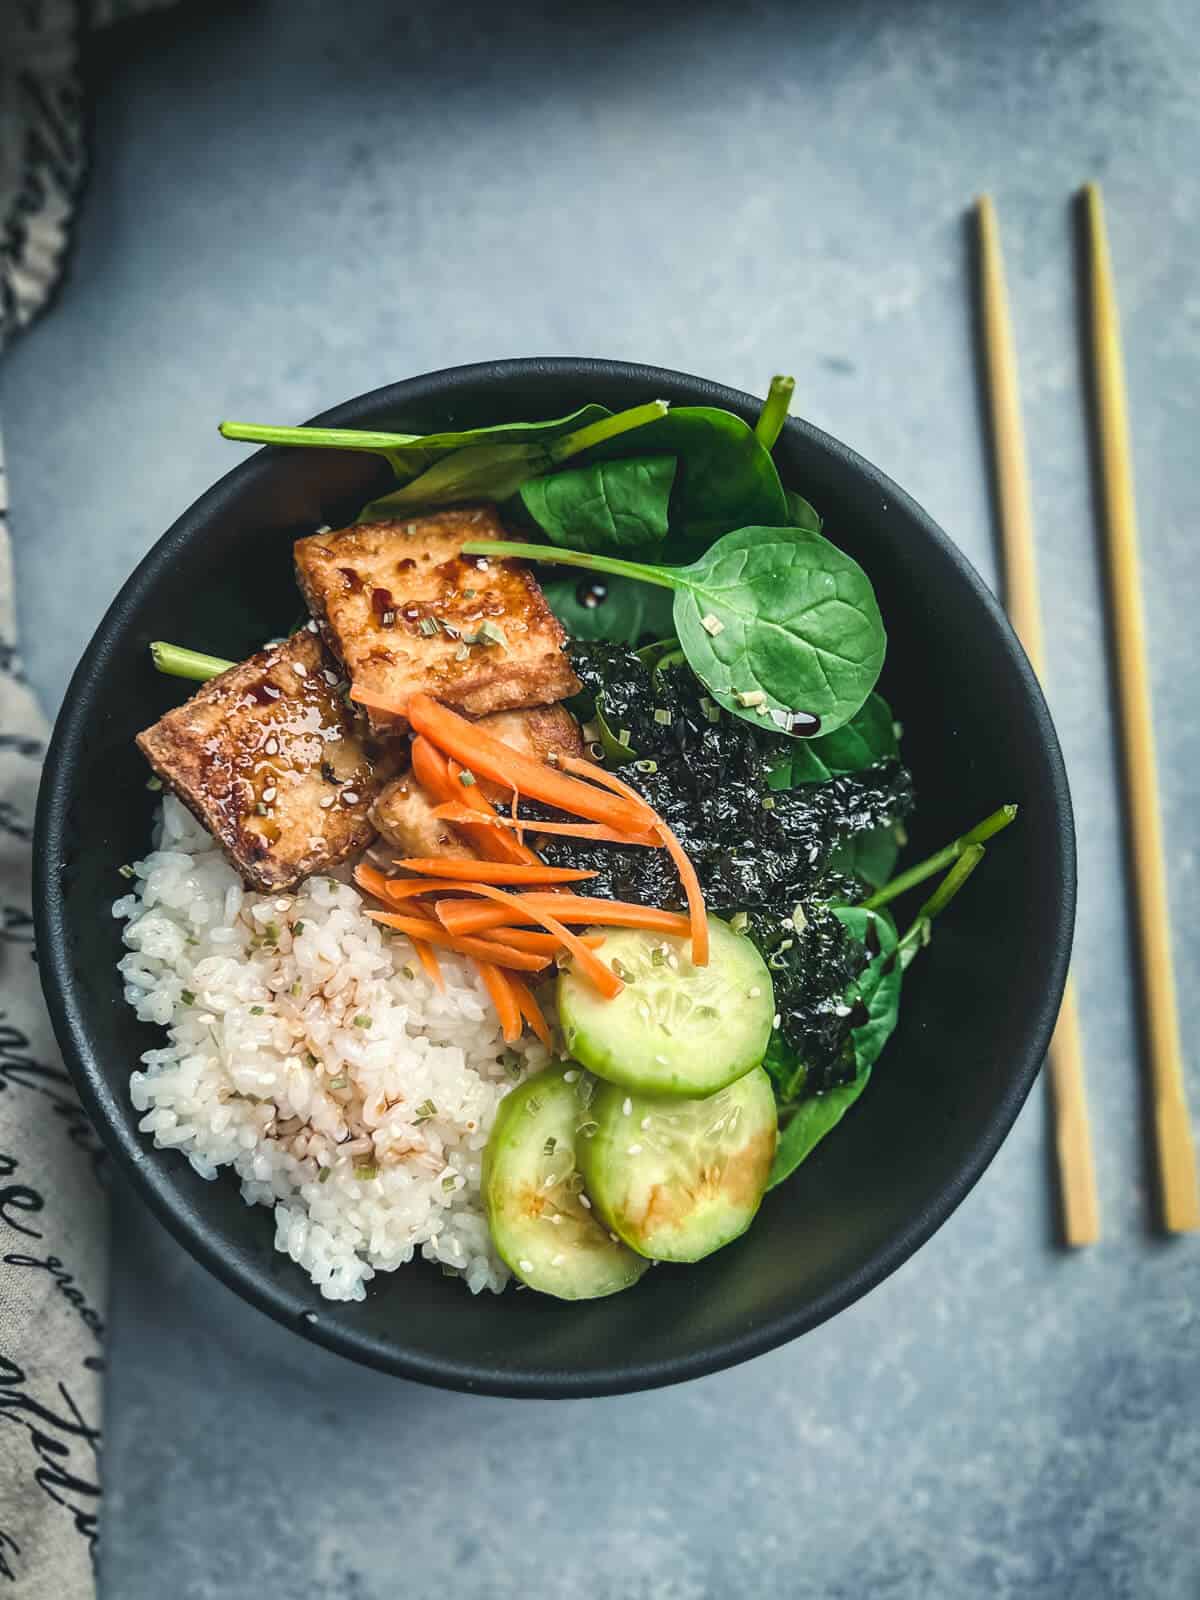
- Versatile recipe - load up your nourish bowls with sushi rice, other proteins, and toppings, or use this sticky rice in homemade sushi rolls.
Here's what you need to make the recipe
Tools
You'll need an Instant Pot and colander to make this recipe. Here are the two that I recommend:
- Instant Pot
- Colander or fine-mesh strainer
Ingredient notes/swaps
- Japanese short grain rice - Here are the recommended types of rice: Kokuho rice, Nishiki, Tamaki gold, or Tamanishiki super premium short grain rice. They are also labeled as sushi rice sometimes.
- Water - Like many rice recipes, follow the 1:1.25 ratio - for every 1 cup of rice use 1.25 cups of water.
For sushi vinegar
- Japanese unseasoned rice vinegar - check to make sure it is unseasoned.
- Sugar - Granulated white sugar is best.
- Salt - Just a pinch to balance the tangy and sweet flavors of the other ingredients.
Be sure to check out the full recipe and ingredient list below.
Recipes tips and tricks
Here are some of my top tips for making the most flavorful sushi rice.
TIPS
- Pick the right kind of rice - Use only short-grain Japanese rice for the best results.
- Scalable recipe - You can easily double or triple the recipe without changing the cooking time.
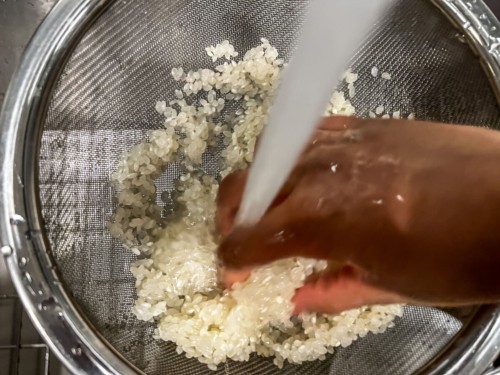
- Rinse the rice - Rinse the rice in a few changes of cold water to remove dirt and excess starch (which makes it easier to digest).
- Let the rice rest -Once cooked, let the rice rest. This allows the steam to redistribute, and all the layers of the rice are evenly cooked. That is why it is important to wait 10 minutes before releasing pressure.
- Avoid overcooking - Once the cooking is done, transfer the cooked rice immediately to a glass bowl to prevent it from overcooking and drying out.
- Gentle mixing - To avoid mushing the rice, use a wooden spoon, plastic rice paddle, or silicone spatula to mix it.
Storage tips
Refrigerator: Sushi rice will dry out when refrigerated. It is best to make sushi immediately after cooking the rice. For best results, refrigerate no more than 3 days in an airtight container.
Reheating leftover rice - Add a tablespoon of water for every cup of leftover rice. Reheat in a microwave for 30-60 seconds until heated through.
Freezer: Store it for a month in an air-tight, freezer-safe container. Note: The rice will be a bit mushy when heated.
Serve it with
You can, of course, use this sushi rice for making homemade sushi rolls. You can also use it as a side dish for Thai curries, poke bowls or make deconstructed sushi bowls - add raw fish (sushi grade!), seared tofu, fresh veggies, pickled goodies like ginger or kimchi, and any toppings you like.

Frequently asked questions
Yes, you should always rinse rice before cooking. This cleans out some of the starchiness and helps to avoid clumping.
It is recommended but not necessary, and I usually don't. Soaking the rice in water before cooking will help the grains to cook more evenly. However, if you skip this step, the rice will still pressure cook perfectly if you use an Instant Pot.
Grains that are too sticky are likely due to not thoroughly rinsing rice or overcooking the sushi rice in the Instant Pot.
The acidity of the vinegar breaks down the starches in the sushi, giving the rice just the right sticky texture and delicious flavor.
No, they are not. Sushi rice is used to make savory meals such as sushi, whereas glutinous rice is primarily used to make mochi (rice cakes), dumplings, and mango sticky rice.
To make sushi, you need rice that'll stick to each other when cooked. That's why long-grain rice, like Basmati rice, which is not starchy enough, won't work. That's why you should stick to short-grain rice.
Other Instant Pot rice recipes to try
- Instant Pot Brown Rice
- Restaurant-style Ghee Rice
- Instant Pot Basmati rice
- Instant Pot Kerala Matta Rice
- Instant Pot Black Rice (Forbidden Rice)
- Aromatic Jeera Rice (Cumin Rice)
📖 Recipe
Want to save this post for later?
Instant Pot Sushi Rice
Equipment
Ingredients
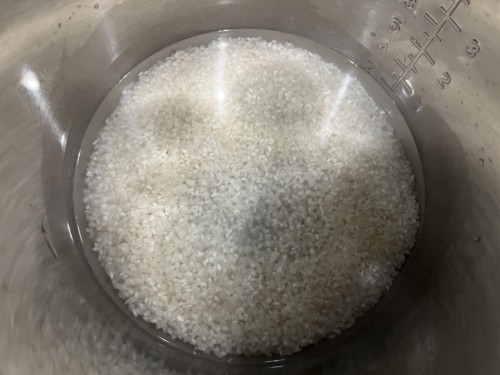
- 1 cup Japanese short grain rice
- 1.25 cups water
Instructions
Cooking Japanese short grain rice
- Rinse the short grain rice using a strainer till the water runs clear.

- Drain the rice completely and add it to the inner pot with water.
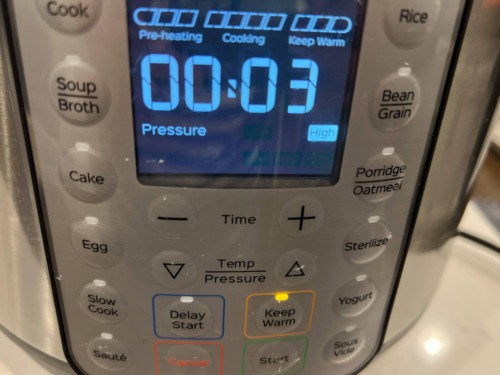
- Close the lid and set the steam valve to sealing.
- Pressure cook for 3 minutes under high pressure.
- When the cooking cycle is complete, wait for 10 minutes before moving the valve to 'venting' to release pressure.
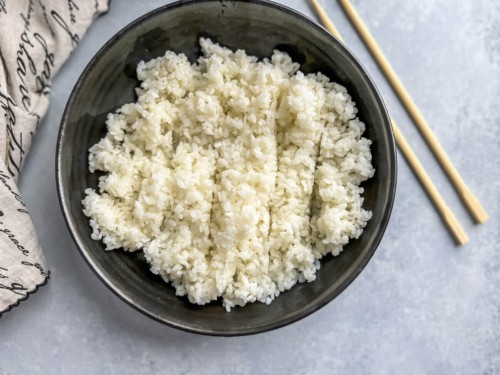
- Open the lid and let the steam escape. Wait a minute or two, and then fluff the rice gently with a fork. Note: The rice is cooked when plumped up, slightly sticky, and the grains look shiny.
- Transfer the rice into another bowl to prevent overcooking. If you are making sushi rice, it is best you transfer it to a big bowl.

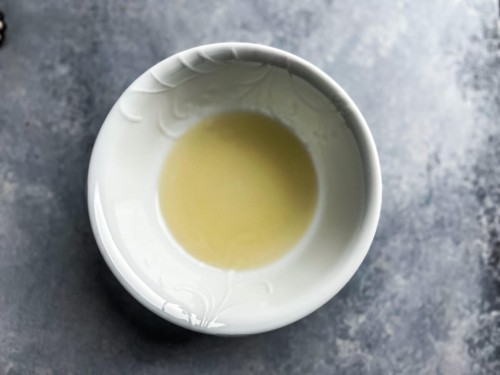
Making sushi vinegar
- Combine all the ingredients for sushi vinegar in a bowl. Microwave for about 15 seconds until the sugar is completely dissolved.
Making sushi rice
- Use a rice paddle and gently slice through the rice (see pic below). Drizzle sushi vinegar over the hot rice. Gently mix the rice using the rice paddle to evenly distribute the sushi vinegar.
- Cover the rice with a damp cloth until you are ready to make sushi.
Notes
- This recipe was tested in an Instant Pot Duo - 6 quart. To make this in an 8-quart Instant Pot, make at least 2 cups of sushi rice since 8-quart needs at least 2 cups of water to come to pressure.
- I used a standard measuring cup for the recipe, not the rice cup that came with Instant Pot.
- If not serving immediately, remove the inner pot from the Instant Pot to prevent the rice from drying out and sticking to the bottom.
- Reheating leftover rice - Add a tablespoon of water for every cup of leftover rice. Mix well and pressure cook for zero minutes. When the cooking cycle is complete, move the valve to 'venting' to release pressure immediately.
Disclaimer: Approximate nutritional information is provided as a courtesy and can vary depending on the exact ingredients/brands used. If you have health issues, please work with a registered dietician or nutritionist.


Comments
No Comments