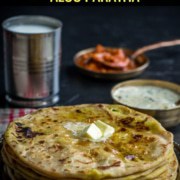
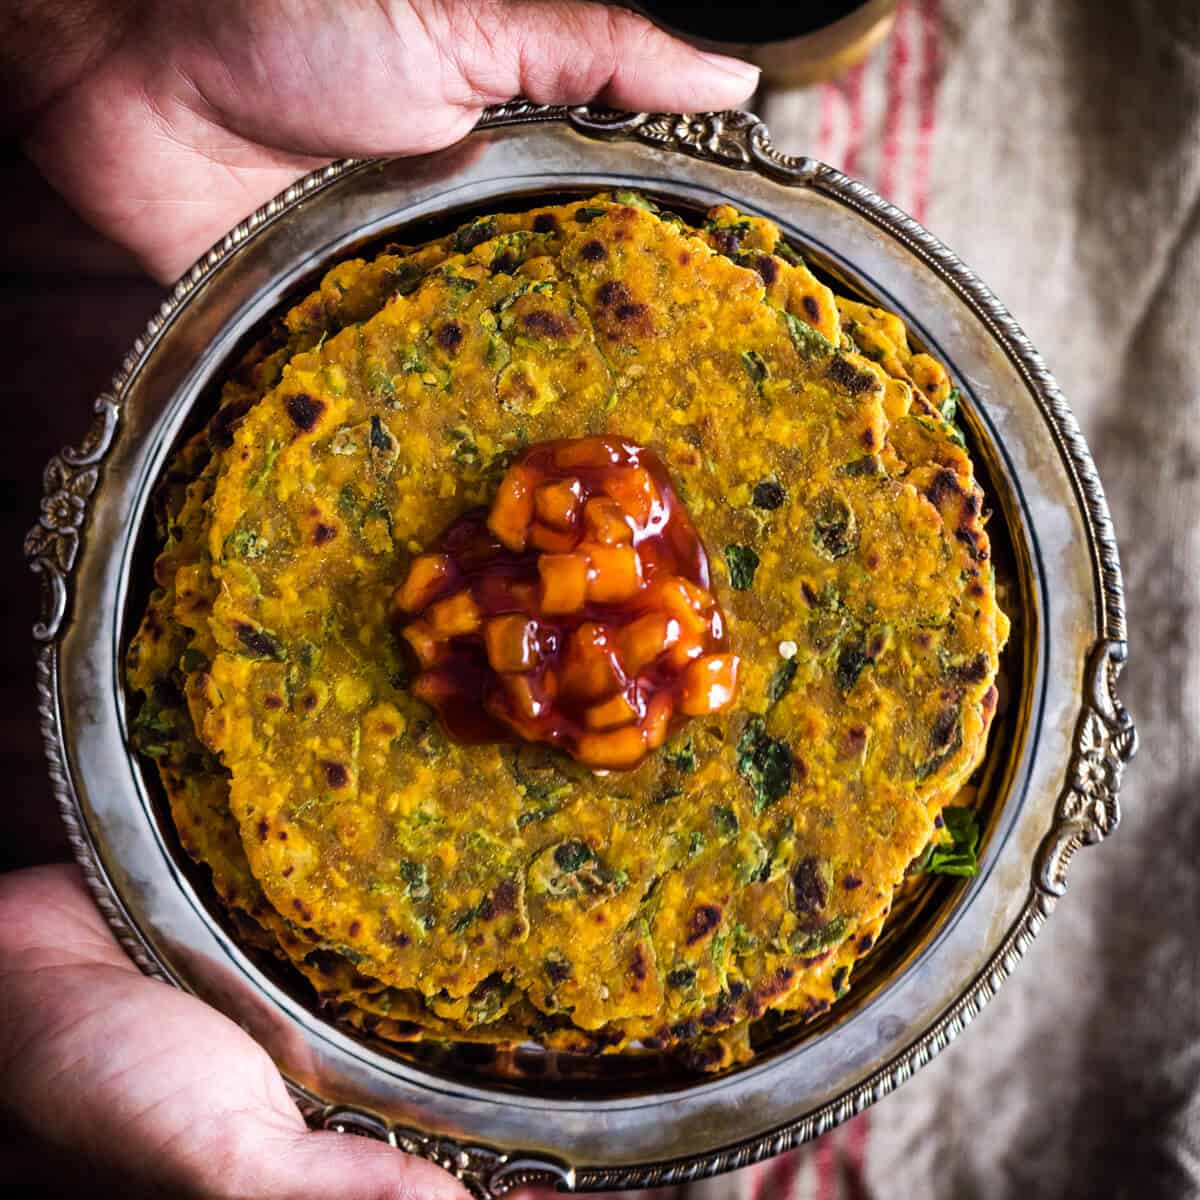
Aloo Paratha - This potato-filled Indian flatbread is the perfect way to start your day right. Pack it for lunch or savor it for brunch - this filling, healthy meal is perfect for any time of the day.
Want to save this post for later?
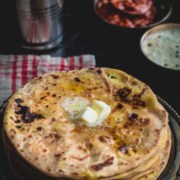
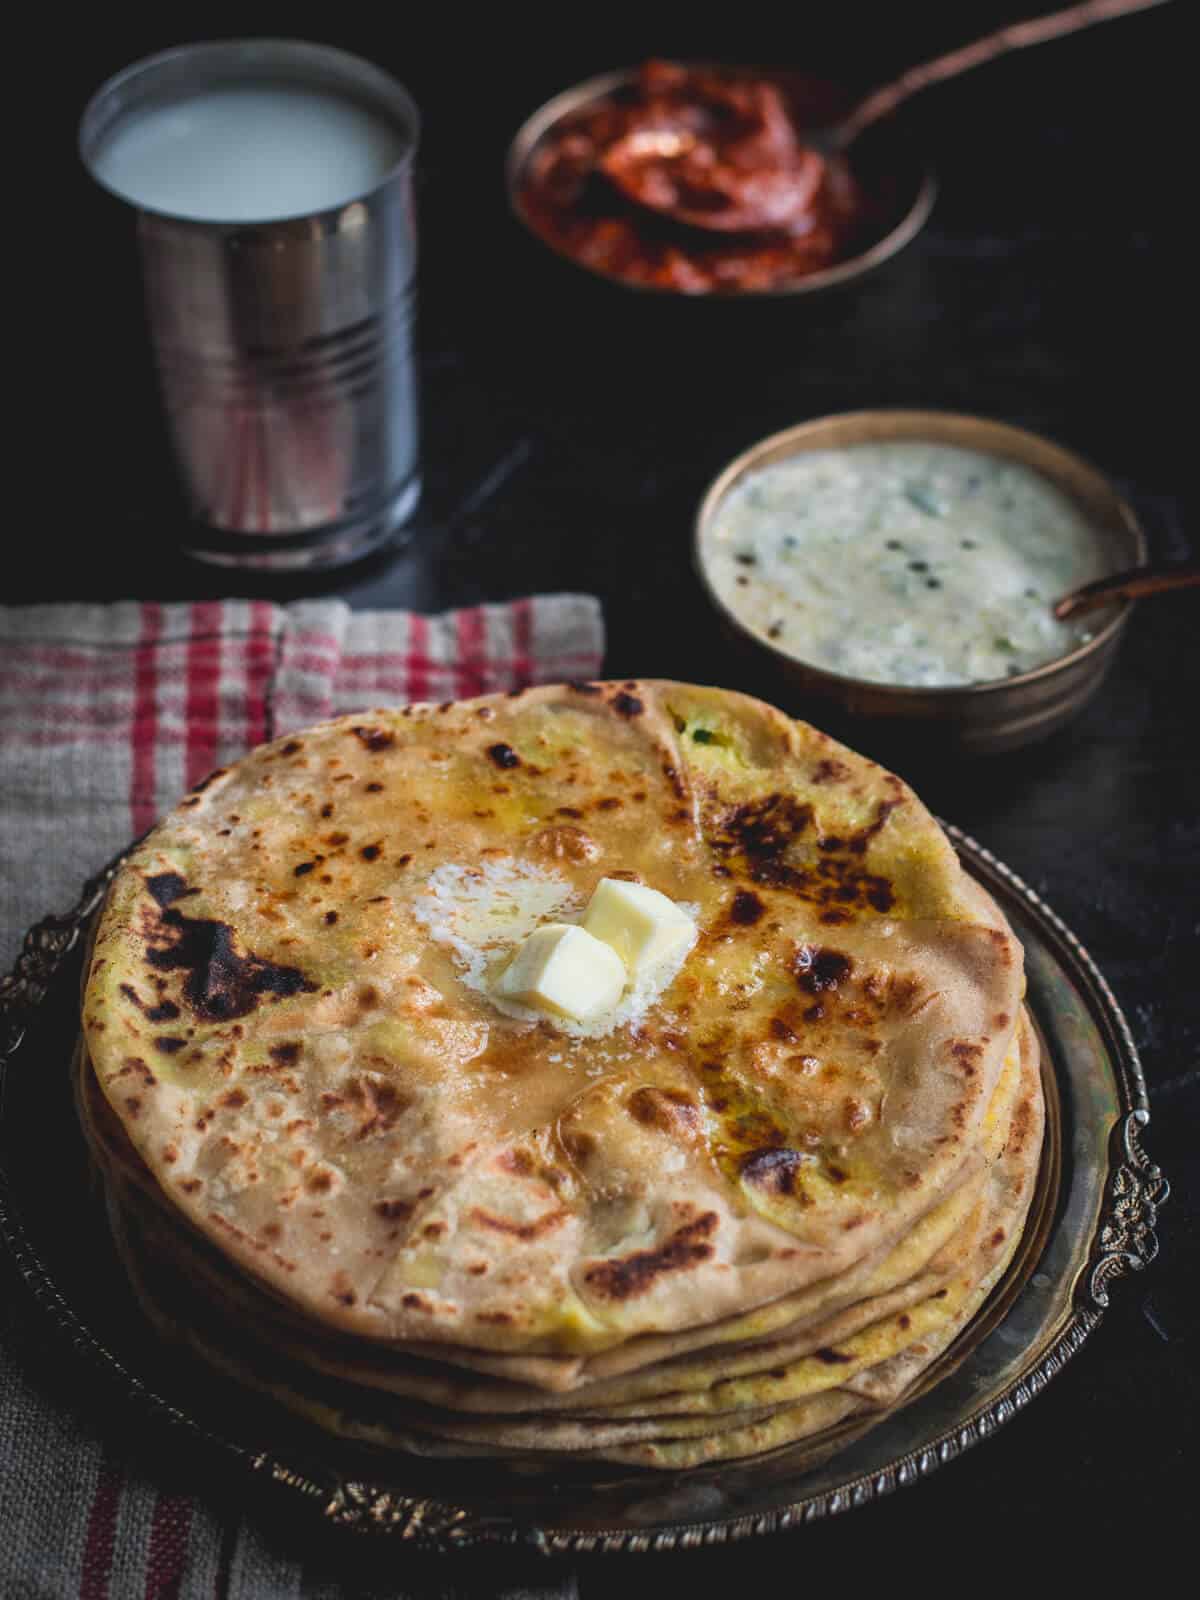
Aloo paratha is perhaps the most popular breakfast dish in India. This is especially true of the north, where it can be found on the menu of practically every restaurant and eatery. For its fans, there is nothing better than beginning the day with a hearty meal of this potato-stuffed delight served with a dollop of butter, chutney or pickle, and yogurt.
Tracing the roots of aloo paratha
Potatoes were introduced by the Portuguese, who brought them over from the New World (South America) in the 17th century. They cultivated it in the western ghats where it was and still is known by its Portuguese name of Batata.
Later, the British introduced it in the North through Calcutta, where it got its more popular name, Aloo. The potato traveled west and north and soon was being cultivated all over the country.
Paratha had already existed in the subcontinent for centuries before potatoes came into the picture. The magic happened when aloo met paratha. Some genius stuffed the dough with mashed potatoes, and we got our ubiquitous aloo paratha.
The origins of the dish are unknown, though there is a theory (unsubstantiated) that it was first made in Maharashtra. It doesn't matter where it comes from, I am thankful that someone thought of it.
Before we move on to the recipe, let's address some frequently asked questions about Aloo Paratha.
What is the difference between paratha and chapati?
Chapati and paratha are similar only in the sense that they are made with the same dough of whole wheat flour and water. The unleavened dough is rolled out into thin discs and then cooked on a griddle.
However, the two are entirely different in taste, texture, and cooking methods. While chapati is rolled without folding and layering and cooked dry, a paratha is distinguished by its layers, which are created by folding the dough before rolling and then basting it with oil while cooking.
What do you call Aloo paratha in English?
You can call it flaky, unleavened Indian bread stuffed with potatoes.
What are the main ingredients in an Aloo paratha?
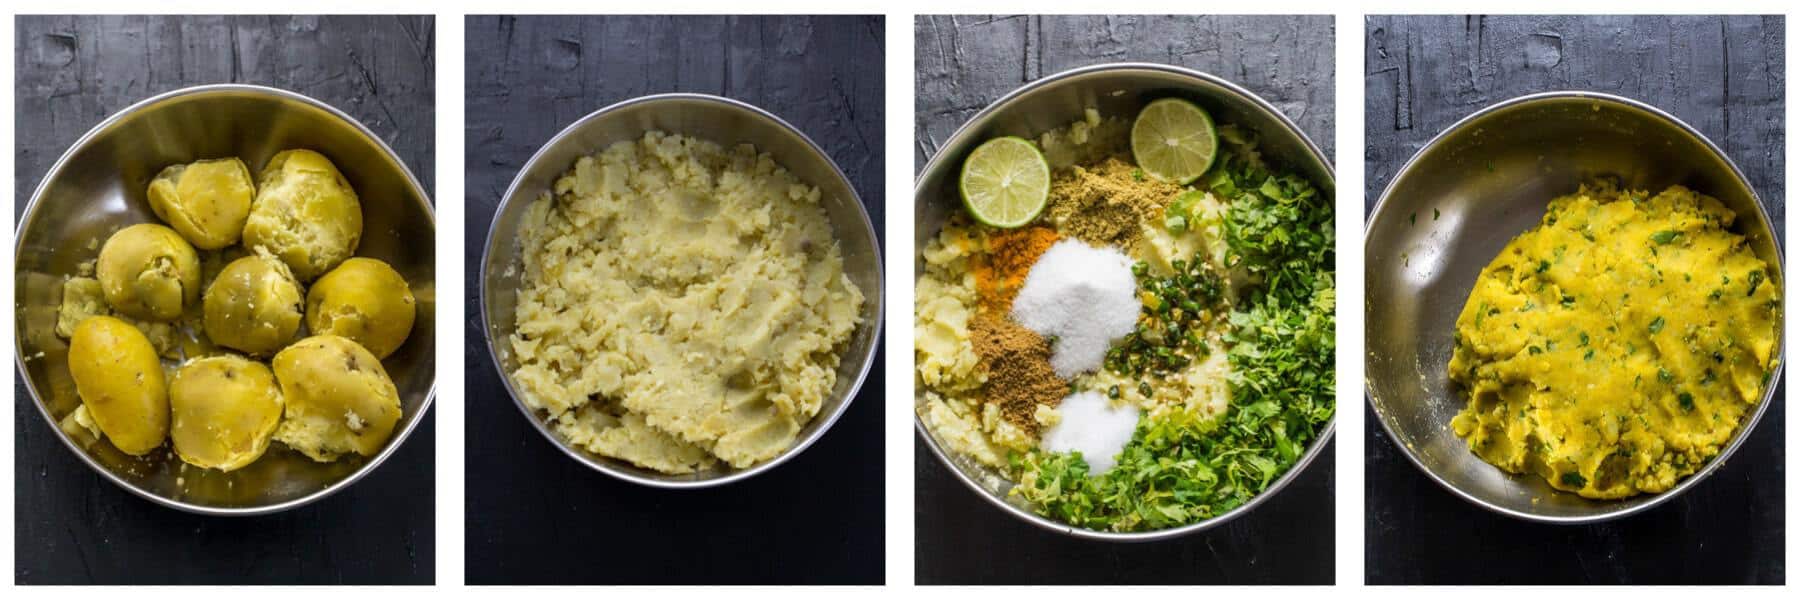
Boiled, mashed potatoes along with spices such as coriander-cumin powder, and garam masala are added to the stuffing along with green chilies and lemon juice for heat and tang and salt and sugar to balance it out. To make the bread that envelopes the stuffing, you need whole wheat flour.
What do you serve with Aloo paratha?
Aloo paratha and sweet lassi are a match made in heaven. You can also pair this dish with pickle, yogurt or raita, or just a dollop of butter.
Is Aloo paratha vegan?
Skip the ghee and butter and use olive oil instead to shallow fry Aloo paratha to make it vegan.
How many calories are in Aloo paratha?
Aloo paratha shallow fried in ghee has 280 calories, whereas if you make it in olive oil, each paratha has 265 calories. If you can cook without using oil, it is 145 calories per paratha.
Note - I am not a registered dietitian or nutritionist. Nutritional information is provided as a courtesy and can vary depending on the exact ingredients you use.
Tips for a perfect Aloo paratha
- Cool down the potatoes completely, and pat dry the potatoes before mashing them - This is to reduce the moisture content in the stuffing as much as possible.
- The smooth texture of the stuffing - Run your fingers in the mashed potatoes to make sure there are no chunks of potatoes in the mixture. Crush it with your fingers if needed to crumble it completely.
- Once you have combined the seasonings with potatoes, do a taste test. Adjust salt and spice as needed.
- Don't forget to add salt to the dough.
- Finely chop both the coriander leaves and the green chilies to prevent tearing of the paratha while you are rolling it out.
- If the paratha is sticking to the base as you are rolling, it is likely because
- The dough is sticky - Fix the dough by adding a teaspoon of flour at a time and kneading it. Repeat this process until the dough is not sticky.
- Leftover dough on the base - Scrape the base and clean off any leftover bits.
How to make aloo paratha
- Make the stuffing - Boil the potatoes with the peel on. Pat dry them before peeling. Mash them till no chunks remain. Let it cool completely before adding the remaining ingredients in the stuffing section. Mix well and set it aside.

- Making the dough - As the potatoes are cooling down, start making the dough
- Combine wheat flour, salt, and a tablespoon of oil, along with a cup of water, and start kneading. Add the remaining water in small increments and continue to knead till the dough comes together as a ball.
- Add the remaining oil to the dough and knead till the oil is absorbed.
- If the dough is sticky, sprinkle approximately ¼ teaspoon wheat flour (or more if needed) on the dough and knead again to form a dough that is not sticky. The dough should be supple and soft.
- Cover the dough and set aside for 15-20 minutes.
- Rolling out the parathas -
- Divide dough into twenty equal portions and roll into balls. Flatten the ball and cover both sides with flour.
- Roll into a circular disc about 4 inches in diameter.
- Place two tablespoonfuls of the stuffing in the center.
- Grab the edges, pleat them, and bring them together in the center.
- Pinch them together to seal them and flatten them using your palm.
- Flatten the ball and cover both sides with flour.
- Use your rolling pin to roll into a flat, round shape. Do this delicately - dusting flour as needed to help with this process.
- Dust off excess flour from the paratha by placing it on the palm of one hand and then flip it on the palm of your other hand. Repeat this process 3-4 times.
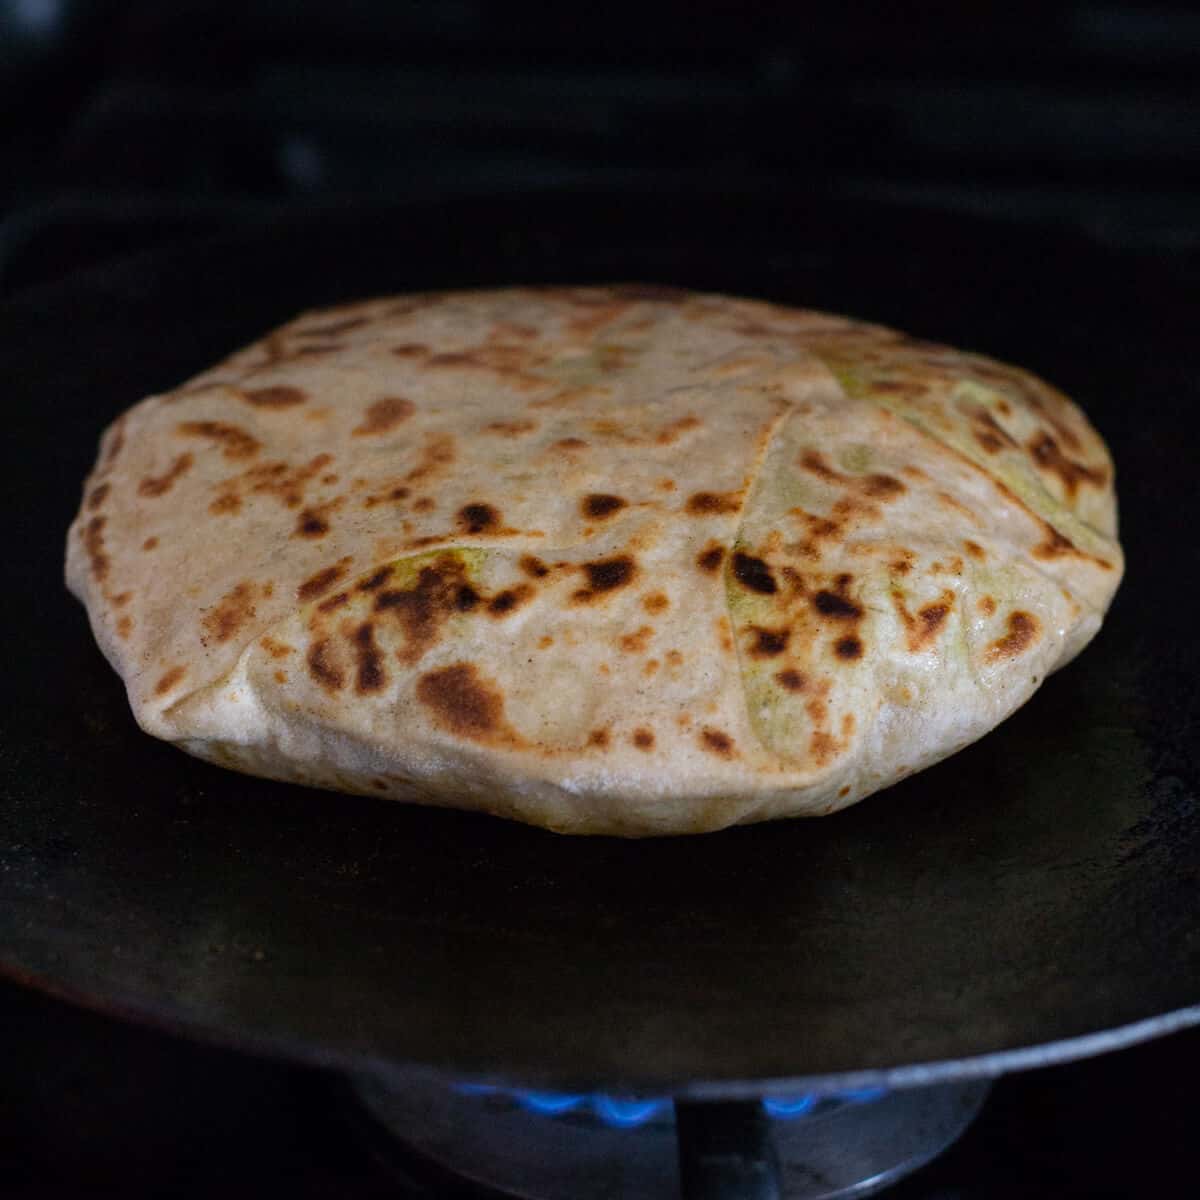
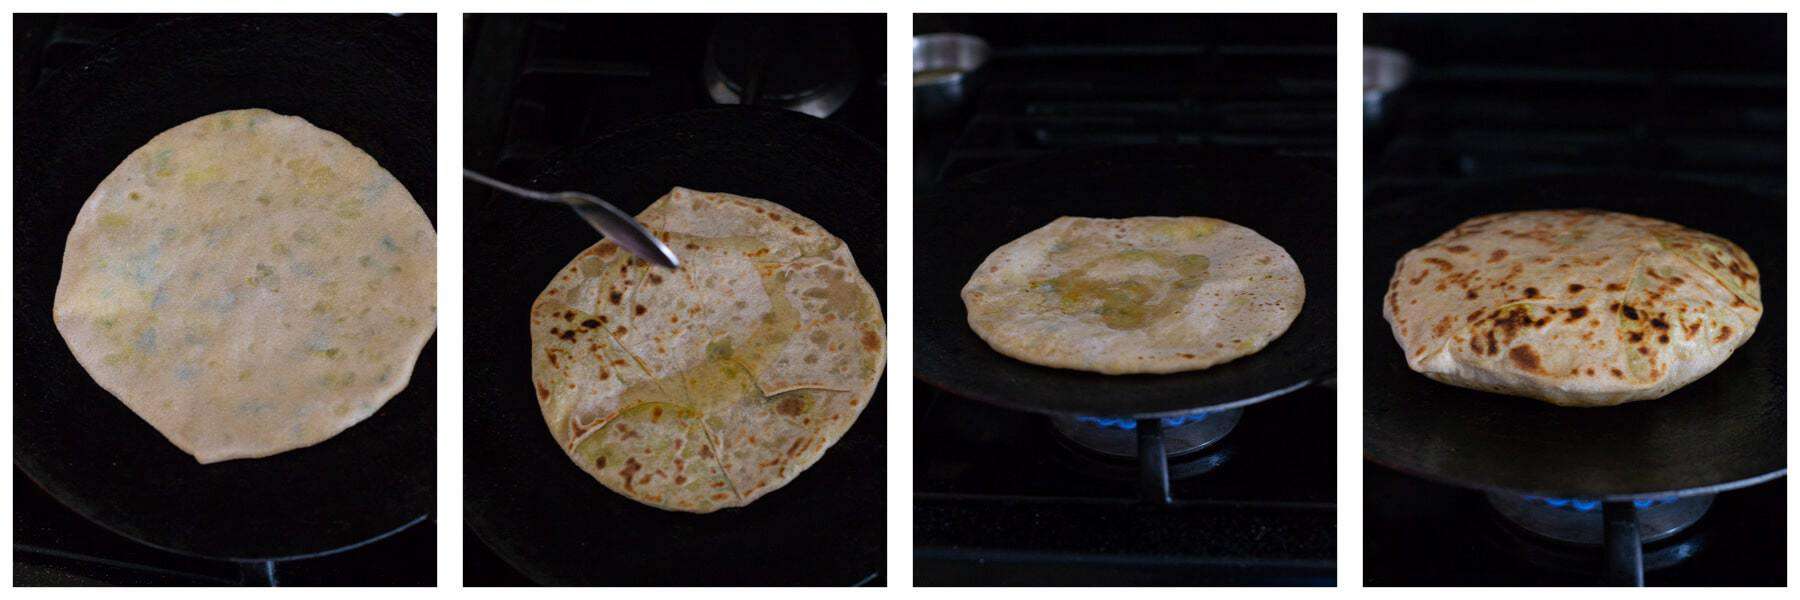
- Cooking the parathas
- Place a tawa/frying pan on gas on medium heat. Once heated, carefully place the paratha on the tawa. Cook until small bubbles form on the top. Turn it over and cook the other side.
- Flip the paratha and add about ½ a tablespoon of ghee to the pan; cook the side for about 15 seconds. Repeat the process with the other side. Use a spatula to press the edges to ensure the sides are cooked through.

Storing and serving suggestions
- Serve the Aloo paratha with yogurt, raita or pickle.
- Store them in a casserole to keep warm for a couple of hours.
- Freezing instructions -
- To freeze the parathas, wait for them to cool down completely.
- Stack the parathas always separated by parchment paper, which is equivalent to the size of the paratha. This makes it easier to separate them after thawing.
- Put them in a freezer-safe ziplock bag.
- Thawing instructions - To thaw leave it in the refrigerator overnight or at room temperature for about 30 minutes. I usually microwave them for a minute and heat them on the tawa for a minute or two till it is uniformly heated.

If you love parathas, then check out this Paneer paratha recipe - it is just as delicious and even easier to make.
📖 Recipe
Want to save this post for later?
Aloo Paratha Recipe
Ingredients
For the dough
- 4 cups whole wheat flour
- 2.5 - 3 cups water
- 1 teaspoon salt
- 2 tablespoons olive oil divided
Potato stuffing
- 7-8 medium sized potatoes boiled and peeled
- 1 teaspoon jeera powder
- ½ teaspoon coriander powder
- 1 teaspoon garam masala
- 3 teaspoons sugar
- 1 teaspoon salt
- 1 teaspoon turmeric powder
- ½ cup finely chopped cilantro / coriander leaves for garnishing finely chopped
- 1 teaspoon chili powder
- 4 green chilies finely chopped
- ½ teaspoon dry mango powder amchur or juice of 1 lemon
For frying
- A tablespoon of oil or ghee per paratha
Instructions
Make the stuffing
- Boil the potatoes with the peel on. Pat them dry before peeling them.
- Mash them till no chunks remain. Let it cool completely before adding the remaining ingredients in the stuffing section.
- Mix well and set it aside.
Making the dough
- As the potatoes are cooling down, start making the dough.
- Combine wheat flour, salt, a tablespoon of oil with 1 cup of water and start kneading.
- Add remaining water in small increments and continue to knead till the dough comes together as a ball.
- Add the remaining oil to the dough and knead till the oil is absorbed.
- If the dough is sticky, sprinkle approximately ¼ teaspoon wheat flour (or more if needed) on the dough and knead again to form a dough that is not sticky. The dough should be supple and soft.
- Cover the dough and set aside for 15-20 minutes.
Rolling out the parathas
- Divide dough into twenty equal portions and roll into balls. Flatten the ball and cover both sides with flour.
- Roll into a circular disc about 4 inches in diameter.
- Place two tablespoonfuls of the stuffing in the center.
- Grab the edges and pleat them and bring them together in the center.
- Pinch them together to seal them and flatten them using your palm.
- Flatten the ball and cover both sides with flour.
- Use your rolling pin to roll into a flat, round shape. Do this delicately - dusting flour as needed to help with this process.
- Dust off excess flour from the paratha by placing it on your palm of one hand and then flip it on the palm of your other hand. Repeat this process 3-4 times.
Cooking the parathas
- Place a tawa/frying pan on gas on medium heat.
- Once heated, carefully place the paratha on the tawa. Cook until small bubbles form on the top. Turn it over and cook the other side.
- Flip the paratha and add about ½ a tablespoon of ghee (see note) to the pan.
- Cook the side for about 15 seconds. Repeat the process with the other side. Use a spatula to press the edges to ensure the sides are cooked through.
- Serve hot with yogurt, pickle or raita.
Notes
- Handy tip - If your stuffing is moist, add a handful of poha (flattened rice flakes). This will not impact the taste.
- You can substitute ghee with oil. You can also reduce the amount of ghee/oil used. You would ideally need about a tablespoon to cook both sides.
- This recipe yields 20 parathas. You can easily halve this recipe.
Disclaimer: Approximate nutritional information is provided as a courtesy and can vary depending on the exact ingredients/brands used. If you have health issues, please work with a registered dietician or nutritionist.


deep says
aloo paratha, such a delicious breakfast idea for morning
thanks, Anu for sharing this Aloo paratha recipe 🙂
Anushree Jayaram says
Thanks for stopping by, Deep!
marilyn faveira says
I am up for the challenge! Can't wait to share this recipe with my husband!
Anushree Jayaram says
🙂 Can't wait to see your creation!
Awesome Dairy says
Aloo Paratha is my all-time favorite with a tablespoon of ghee its taste the best.
Anushree Jayaram says
I agree :-). Thanks for stopping by.