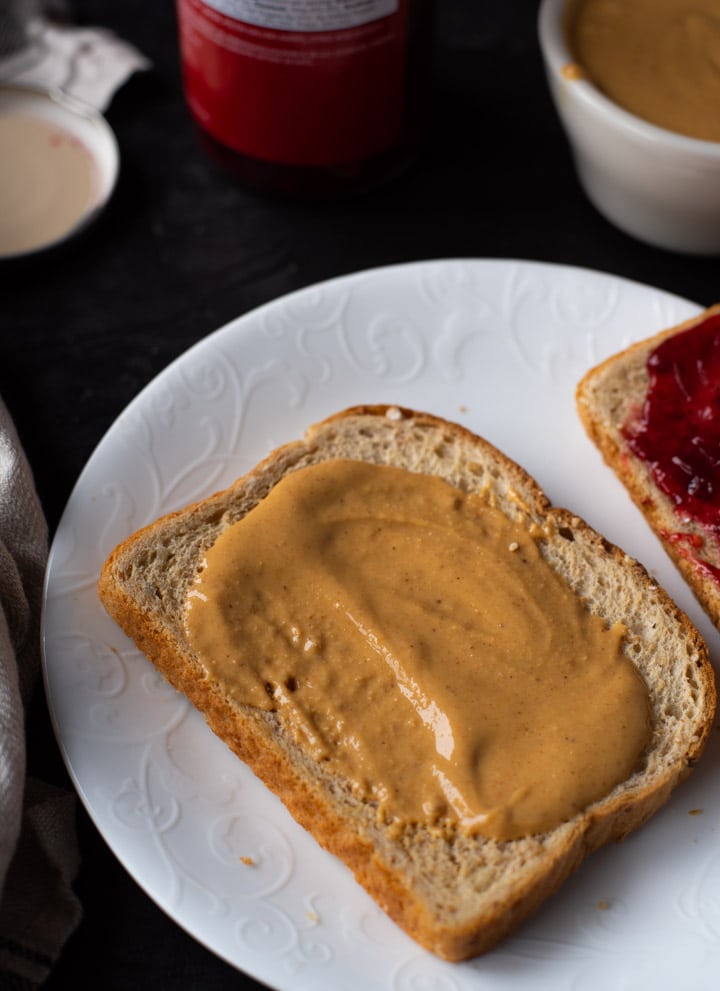
Healthy Peanut Butter
Note: This post contains affiliate links. As an Amazon Associate I earn from qualifying purchases.
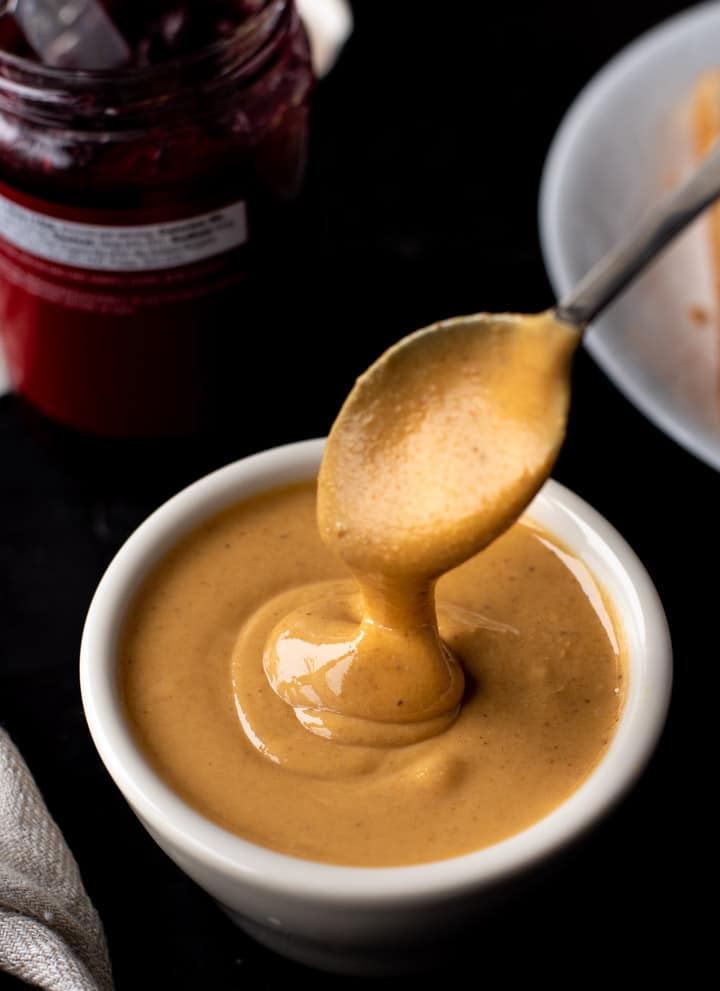
Learn how to make your own creamy and healthy homemade peanut butter with this one-ingredient recipe.
When I first came to the US, I fell in love with the creamy, nutty taste of peanut butter. As a grad student with limited cooking skills and time, making PB&J became my go-to breakfast. To this day, eating a creamy yet sweet peanut butter and jelly sandwich takes me back to those first years here.
Why is homemade nut butter good for you?
While buying homemade nut butter at the store is extremely convenient, making it at home is a healthier option. Many manufactured nut butter contain additives that aren’t very healthy for you. Hydrogenated oils, sugars, and food colorings are some of the added ingredients in store-bought peanut butter.
By making your nut butter at home, you know exactly what you are putting in and what you are getting out of your peanut butter. Homemade nut butter is packed with nutrients and minerals such as biotin, folate, and magnesium, as well as unsaturated fats.
Different kinds/textures of peanut butter
The two main kinds of peanut butter are creamy and chunky. Creamy, like the kind in this recipe, contains uniformly ground peanuts. Chunky, on the other hand, contains a mixture of ground and chopped peanuts.
Why you’ll love this healthy peanut butter recipe
Aside from the wonderful health benefits associated with homemade peanut butter, there are many additional reasons to love this quick and delicious recipe!
- No oil- this recipe contains no added oils.
- You know what goes into it – simple ingredients help you know exactly what you are putting into your peanut butter.
- Inexpensive – peanuts are the cheapest nut on the market, making this recipe budget-friendly.
How to make peanut butter
Ingredients: roasted peanuts.
Optional add-ons – salt, honey, or maple syrup (to sweeten it).
Process
Step 1 – Roast peanuts (or get store-bought roasted peanuts)
To begin, roast your peanuts to intensify the flavor. You can choose to either air fry or roast peanuts in the oven.
To roast in the oven, bake at 325°F for 10-12 minutes. Toss the peanuts halfway for even browning.
If you roast them in the air fryer, cook at 325°F for 10 minutes. Remember to toss the peanuts halfway through for even cooking. I prefer to use the air-fryer because it is faster and gives perfect results every time.
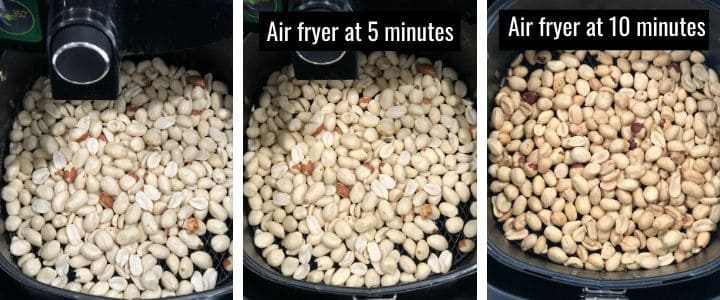
Note: Let the peanuts cool down for at least 10 minutes before grinding.
Step 2 – Blend peanuts
- Pour the roasted peanuts into the bowl of a food processor.
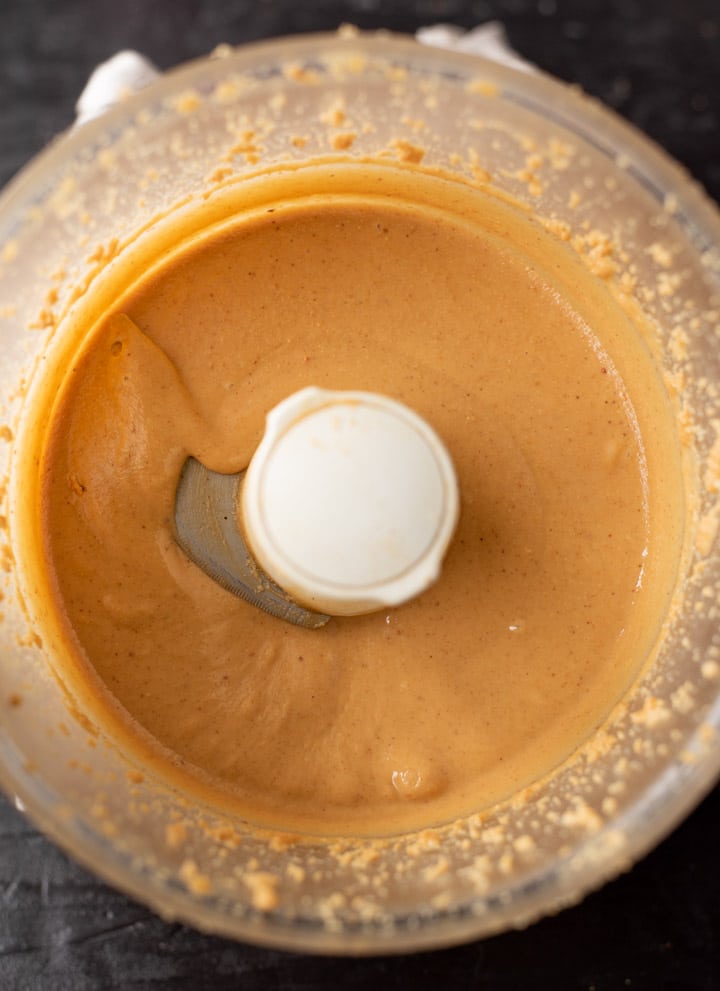
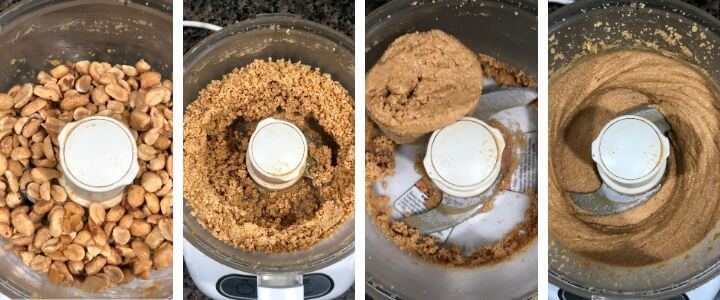
- Blend the peanuts till they turn into a smooth and creamy paste. Stop and scrape every 2-3 minutes or as needed. The blending process should take about 3-5 minutes. Depending on the food processor, this could take more or less time- the key is to be patient. (Note: When you start blending, the peanuts will turn into a dry powder first, it then rolls up into a dough and then finally starts turning into a paste.)
- If using salt and maple syrup, add them at this point and mix well with a spatula to incorporate it in. Alternatively, blend the salt and syrup in with the food processor for a creamy paste, but I find it’s easier to just mix it with a spatula.
- Store the peanut butter in a glass jar or airtight container in the refrigerator for about 2-3 months.
Tips
- Allow roasted nuts about 5-10 minutes for cooling before blending them.
- The food processor grinds nut butter faster compared to a high-performance blender. So, if you have a food processor try that first.
- You’ll need to determine the minimum quantity of nuts you need to add to your food processor so that these nuts grind properly. For my food processor, it was about 2 cups.
- To prevent your blender or food processor from overheating and shutting down, stop and scrape the sides every 3 minutes. Then wait for about 30-60 seconds before blending again. Ideally, this should not take more than 5 minutes.
- The blending time will vary depending on the device you use. Be patient and look for visual cues as explained in the instructions above.
- You don’t need oil for this recipe. Simply grind the peanuts first and then add any desired flavors.
Flavoring options – add salt, honey, or maple syrup
How to store peanut butter
Refrigerate and use it within 2-3 months. This will help prevent the peanut butter from molding.
In fact, nuts are prone to molding and should be stored in a cool dry place. You can freeze nuts if you buy them in bulk. Then, take them out when you are ready to use or consume them.
What can I use peanut butter for?
- Smoothies
- As a topping in oatmeal
- Granola / Granola bars.
- As a dip with your favorite fruits – apples, strawberries, etc.
- With jams or jelly to make a peanut butter sandwich.
- Makes for a lovely gift too!
Is eating peanut butter good for you?
Yes, eating healthy homemade peanut butter can be good for you, but there is such a thing as too much of a good thing. While peanut butter is packed with protein and low in carbohydrates, not all are made the same. Many store-brand peanut butter contains added sugar, oils, and fats that are not good for you.
Is it okay to eat peanut butter every day?
It is okay to eat peanut butter every day. Packed with fiber and protein peanut butter makes an excellent daily snack. Simply measure the serving size when you plan to enjoy the healthy nut butter.
Other easy-to-make nut butter that is worth making at home –
- Almond Butter — Considered the healthiest nut butter, almond butter can be quickly made at home.
- Homemade cashew butter – You have to try this creamy and delicious cashew butter and it might just become your favorite nut butter. Spread it on toast, add it to smoothies, or even when making granolas – you will love the fresh, homemade taste!
- Hazelnut butter – This hazelnut butter recipe is a healthy take on the popular hazelnut spread – Nutella. Make it at home in less than 10 minutes using your food processor.
Homemade Peanut Butter Recipe
Ingredients
- 2 cups unsalted peanuts roasted [see note]
- 1 tablespoon maple syrup or honey, optional
- ⅛ tsp salt optional
Instructions
- Add the roasted peanuts [see note] in the bowl of a food processor.
- Blend the peanuts turn into a smooth and creamy paste. The peanut butter goes through various phases as you grind it – starts with a dry powder, rolls up into a dough and then finally starts turning into a paste [see step by step pics in the post].
- Stop to scrape the sides of the bowl every couple of minutes, if needed. Takes about 3-5 minutes to get a fine paste. The timings may vary depending on your blender.
- Add salt and maple syrup, if using and mix well with a spatula to incorporate it in.
- Store the peanut butter in a glass jar or airtight container in the refrigerator for about 2 months.
Notes
How to roast peanuts
Roasting the peanuts at home is cheaper and you can do it without oil in an oven or an air-fryer. It takes about 10 minutes in an air-fryer at 325°F and about 10-12 minutes in an oven kept at the same temperature. Don’t forget to toss the peanuts at the 5-minute mark for even browning. I prefer to air fry since there is no preheating needed and the peanuts are evenly roasted. Make sure you let the peanuts cool down for at least 10 minutes before grinding. Tips- Let the roasted nuts cool down for about 5-10 minutes before blending them.
- From what I have seen the food processor grinds nut butter faster compared to a high-performance blender. So if you have a food processor try that first.
- You’ll need to determine the minimum quantity of nuts you need to add to your food processor so that these nuts grind properly. For my food processor, it was about 2 cups.
- Blenders and food processors can overheat and shut down. That’s why don’t run your machine for more than 3 minutes at a stretch. Stop and scrape the sides every 3 minutes and wait for about 30-60 seconds before blending again.
- The blending time will vary depending on the device you use. Be patient and look for visual cues as explained in the instructions above.
- You don’t need oil for this recipe just make sure to grind the peanuts first and then add any flavorings.
Disclaimer: Approximate nutritional information is provided as a courtesy and can vary depending on the exact ingredients/brands used. If you have health issues, please work with a registered dietician or nutritionist.

