Healthy Hazelnut Butter + Spread Recipe
Note: This post contains affiliate links. As an Amazon Associate I earn from qualifying purchases.
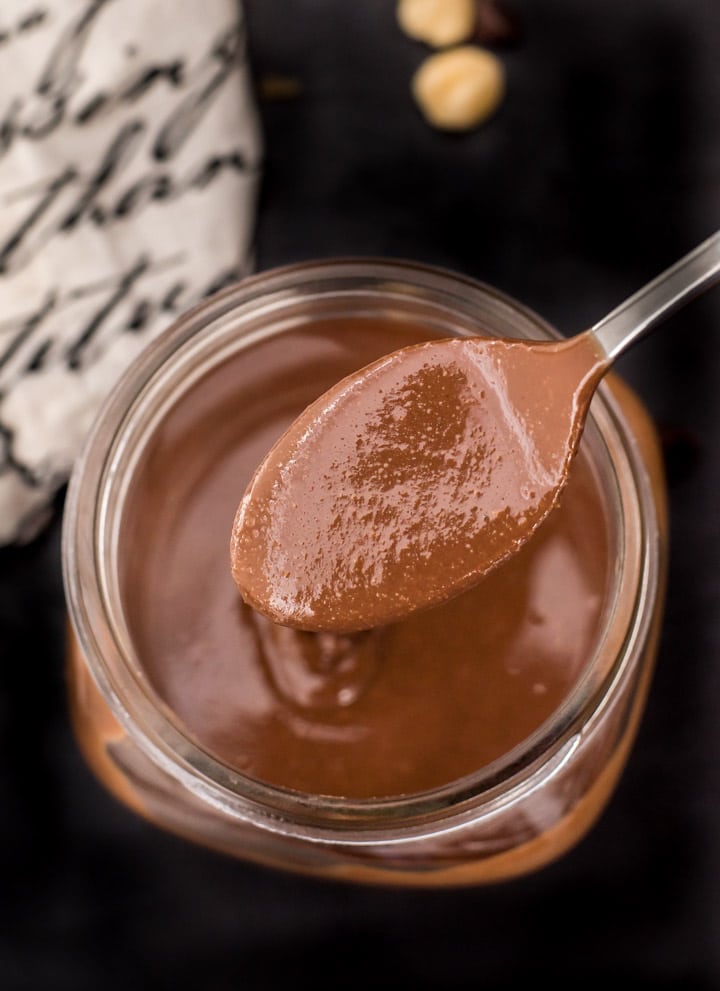
This hazelnut butter recipe is a healthy take on the popular hazelnut spread – Nutella. Make it at home in less than 10 minutes using your food processor.

A lot of research went into this hazelnut butter recipe better known by its brand name Nutella. The first time I made it, my daughters kindly pointed out that there was room for improvement. The nut butter was too coarse, not very sweet and did not taste like the ‘original’.
It was probably because the spread had more hazelnut than chocolate. And you know with kids once they are used to the sweet tasting Nutella they find it difficult to appreciate the ‘real’ thing.
Though I wanted my daughters to give this recipe their seal of approval, I was also adamant about the fact that I didn’t want the primary ingredient of this hazelnut spread recipe to be sugar. That’s why this recipe has been tested and retested more times than any other recipe in this blog and of course, since it is a Nutella knock off no one complained :).
Fun fact: Hazelnut chocolate spread has an interesting origin story. I encourage you to read this article on how a mid-19th century recipe called Gianduia (pronounced “john-DOO-ya”) transformed into what we know popularly know as Nutella.
Read more – The birth of chocolate hazelnut spread.
Why you’ll love this recipe
- It tastes great even though it has more hazelnuts and less sugar than the store bought one.
- You can confidently feed this spread to your kids knowing what exactly went into this recipe.
- Two in one recipe – You’ll not only learn the steps to make hazelnut butter but also how to transform it into a chocolate hazelnut spread.
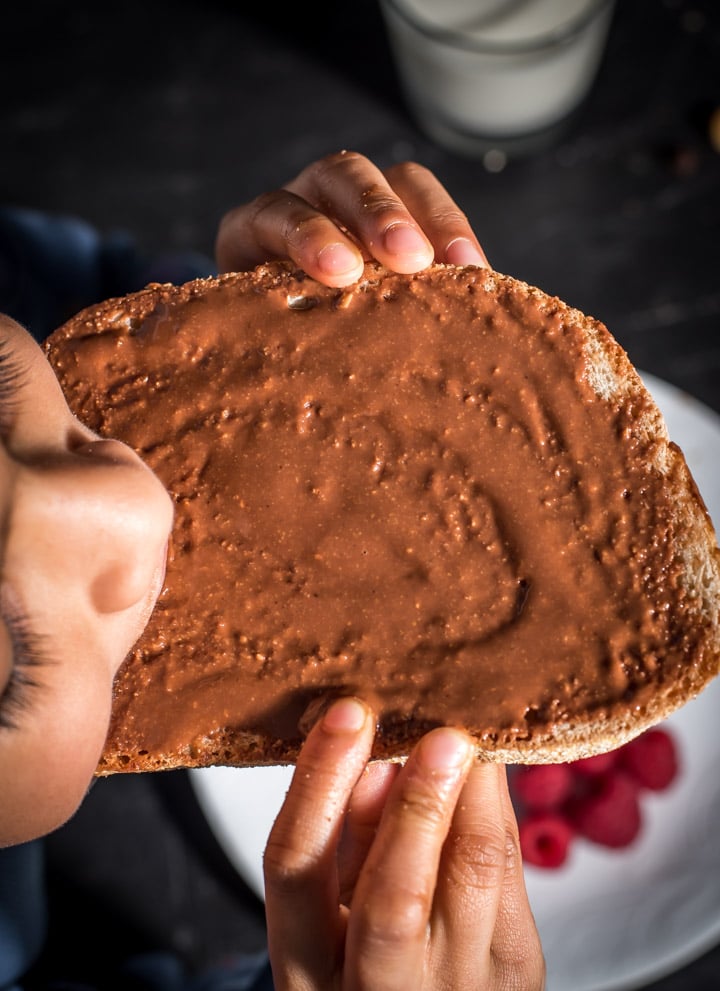
How to make hazelnut butter
There are two ways to make hazelnut spread – a plain version with a hint of salt and maple syrup and a chocolate version with milk chocolate morsels and oil. Let’s start with plain hazelnut butter.
Ingredients: skinned hazelnuts. Optional add ons – milk chocolate morsels, vanilla extract, oil, maple syrup or honey
Note: The hazelnuts we bought the first time had skin + shell. It was not fun trying to break the shell, get the hazelnuts out and then roast them to get the skin out. I recommend buying hazelnuts without the skin (it is such a huge time saver!).
Process
Step 1 – Roast hazelnuts (or get store-bought roasted hazelnuts)
You can either use an air fryer or an oven but I prefer an air-fryer because there is no need to preheat and it gives perfect results every time.
Roasting hazelnuts takes about 6 minutes in an air-fryer at 325°F and about 10-12 minutes in an oven kept at the same temperature. Don’t forget to toss the hazelnuts at the half-way mark for even browning.
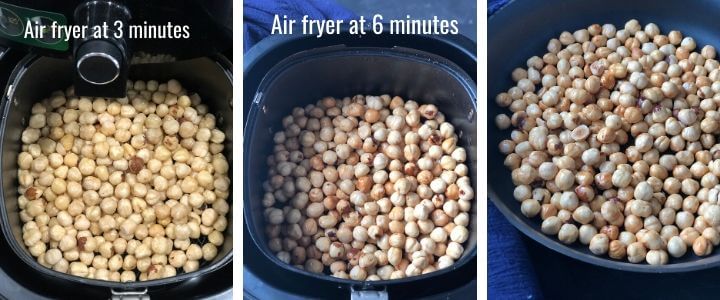
Note: Let the hazelnuts cool down for at least 10 minutes before grinding.
Step 2 – Blend hazelnuts
- Place the roasted hazelnuts in the bowl of a food processor.
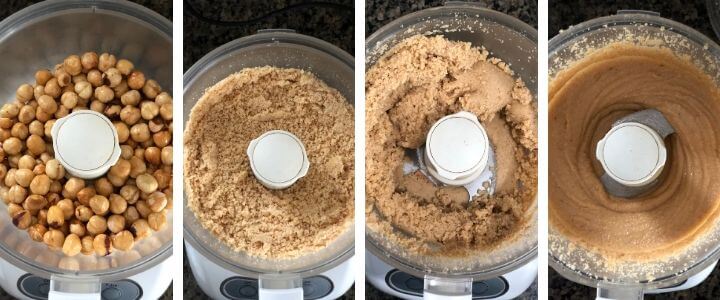
- Blend the hazelnuts till they turn into a smooth and creamy paste. Stop and scrape every 2-3 minutes or as needed. The blending process should take about 8-10 minutes. It may be faster or slower depending on your blender – the key is to be patient. (Note: When you start blending the hazelnuts, it will turn into a dry powder first, and then will roll up into a dough. The last step is when it finally starts turning into a smooth paste.)
- To make plain hazelnut butter – Add salt and maple syrup at this point and mix well with a spatula to incorporate it in. You can also blend it in but you’ll need to run it for a few more minutes to get that creamy paste – it is just easier to mix it with the spatula.
- Store the hazelnut butter in a glass jar or airtight container in the refrigerator for about 2-3 months.
How to make chocolate hazelnut spread
While the store-bought Nutella has 7 ingredients with sugar being the primary ingredient, this chocolate spread recipe has only 3 key ingredients – hazelnuts, chocolate chip morsels and avocado oil.
Now let’s convert this hazelnut butter into a chocolate spread –
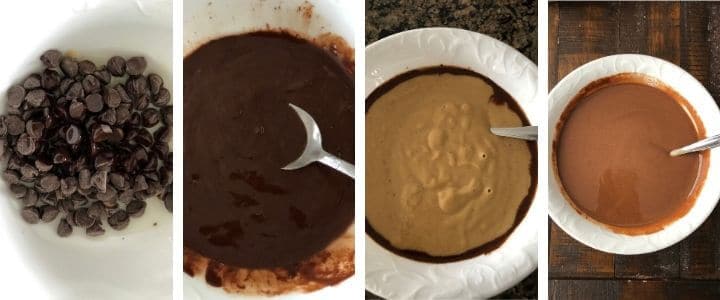
- Add milk chocolate morsels along with oil to a microwave-safe bowl.
- Microwave it for about 30-45 seconds till the chocolate chip morsels have completely melted.
- Pour this chocolate mixture into the freshly ground hazelnut butter to make a chocolate based spread.
- Store the hazelnut butter in a glass jar or airtight container in the refrigerator for about 2-3 months.
Note
- When making the chocolate hazelnut spread you could use cocoa powder instead of chocolate morsels but that makes the spread a tad bitter and then you’ll have introduce sugar to sweeten it up.
- If you like dark chocolate then you can replace the milk chocolate morsels with dark to mix it up.
- You can use coconut oil but it solidifies quickly that is why I prefer avocado oil.
- Hazelnut butter will solidify in the refrigerator. Transfer as much as needed in a bowl and microwave it for about 10 seconds to transform it into a spreadable texture.
- This hazelnut spread recipe while silky is not as smooth as the store bought one simply because it has more nut than sugar.
Tips
- Let the roasted nuts cool down for about 5-10 minutes before blending them.
- From what I have seen the food processor grinds nut butter faster compared to a high-performance blender. So if you have a food processor try that first.
- You’ll need to determine the minimum quantity of nuts you need to add to your food processor so that these nuts grind properly. For my food processor, it was about 2 cups.
- Blenders and food processors can overheat and shut down. That’s why don’t run your machine for more than 3 minutes at a stretch. Stop and scrape the sides every 3 minutes and wait for about 30-60 seconds before blending again.
- The blending time will vary depending on the device you use. Be patient and look for visual cues as explained in the instructions above.
Frequently asked questions about hazelnut butter
How to store hazelnut butter
Refrigerate and use it within 2-3 months.
What can I use hazelnut butter for?
- On a warm toast.
- Smoothies such as this Nutella banana smoothie.
- As a dip with apples, bananas.
- As a topping in oatmeal.
- In brownies, cookies and mug cakes.
- Granola / Granola bars.
- Makes for a lovely gift too.
- Almond Butter– Considered the healthiest of the nut butters, quickly make this delicious and creamy almond butter at home.
- Homemade cashew butter – You have to try this creamy and delicious cashew butter and it might just become your favorite nut butter. Spread it on toast, add it to smoothies or even when making granolas – you will love the fresh, homemade taste!
- Peanut butter – Learn how to make your own creamy and healthy homemade peanut butter with this one ingredient recipe.

Homemade Hazelnut Butter Recipe
Ingredients
- 2 cups skinned hazelnuts roasted [see note]
- ⅛ teaspoon salt optional
- 1 tablespoon maple syrup optional
- ¼ cup milk chocolate morsels optional
- 1 teaspoon avocado oil optional
Instructions
- Add the roasted hazelnuts [see note] in the bowl of a food processor.
- Blend the hazelnuts till turn into a smooth and creamy paste. The hazelnut butter goes through various phases as you grind it - starts with a dry powder, rolls up into a dough and then finally starts turning into a paste [see step by step pics in the post].
- Stop to scrape the sides of the bowl every couple of minutes, if needed. Takes about 8-10 minutes to get a fine paste. The timings may vary depending on your food processor.
- To make plain hazelnut butter – Add a pinch of salt and maple syrup at this point and mix well with a spatula to incorporate it in.
How to make chocolate hazelnut spread
- Add milk chocolate morsels along with oil to a microwave-safe bowl.
- Microwave it for about 30-45 seconds till the chocolate chip morsels have completely melted.
- Pour this chocolate mixture into the freshly ground hazelnut butter to make a chocolate based spread.
- Store the hazelnut butter in a glass jar or airtight container in the refrigerator for about 2 months.
Notes
- When making the chocolate hazelnut spread you could use cocoa powder instead of chocolate morsels but that makes the spread a tad bitter and then you’ll have introduce sugar to sweeten it up. That's why I prefer chocolate chip morsels.
- If you like dark chocolate then you can replace the milk chocolate morsels with dark to mix it up.
- You can use coconut oil but it solidifies quickly so choose avocado oil instead.
- Hazelnut butter will solidify in the refrigerator. To use, transfer as much as needed in a bowl and microwave it for about 10 seconds to transform it into a spreadable texture.
How to roast hazelnuts
Roasting hazelnuts at home is cheaper and you can do it without oil in an oven or an air-fryer. It takes about 6 minutes in an air-fryer at 325°F and about 10-12 minutes in an oven kept at the same temperature. Don’t forget to toss the hazelnuts at the 3-minute mark for even browning. I prefer to air fry since there is no preheating needed and the hazelnuts are evenly roasted. Make sure you let the hazelnuts cool down for at least 10 minutes before grinding. Tips- Let the roasted nuts cool down for about 5-10 minutes before blending them.
- From what I have seen the food processor grinds nut butter faster compared to a high-performance blender. So if you have a food processor try that first.
- You'll need to determine the minimum quantity of nuts you need to add to your food processor so that these nuts grind properly. For my food processor, it was about 2 cups.
- Blenders and food processors can overheat and shut down. That's why don't run your machine for more than 3 minutes at a stretch. Stop and scrape the sides every 3 minutes and wait for about 30-60 seconds before blending again.
- The blending time will vary depending on the device you use. Be patient and look for visual cues as explained in the instructions above.
Disclaimer: Approximate nutritional information is provided as a courtesy and can vary depending on the exact ingredients/brands used. If you have health issues, please work with a registered dietician or nutritionist.
Nutrition


