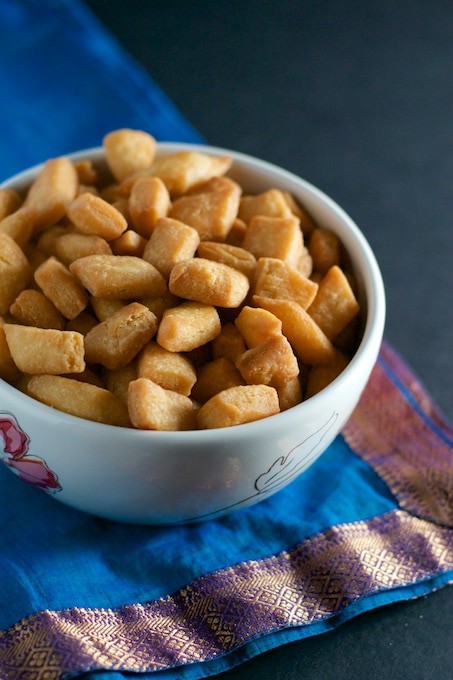
Shakarpara or Shankarpali is an extremely addictive snack that often finds its way in our Diwali sweet platter. Learn how to prepare Shankarpali in 30 minutes!

Shakarpara or Shankarpali is an extremely addictive snack that often finds its way in our Diwali sweet platter. Learn how to prepare Shankarpali in 30 minutes!

We wrapped up our spectacular weekend with a Harry Potter movie and some sweet and spicy popcorn. Here's the recipe - perfect for a family of 4.
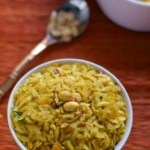
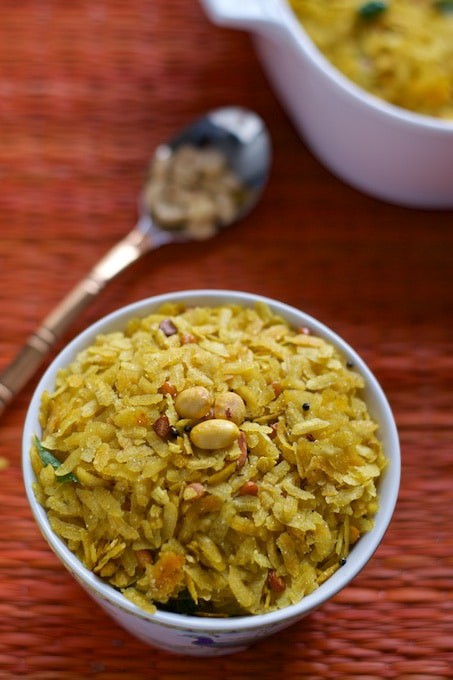
[Read more...]Say no to store bought chivdas! Make this Poha chivda this Diwali and all you need is 10 minutes. Makes for a great after school snack as well!
It is funny how being a parent changes you.
I used to love eating Chivdas, Bhel Puri, Sev Puri every kind of junk food you can think of when I didn't have kids. Though I still enjoy these snacks from time to time, I never give them to my kids.
I always question whether the oil that has been used is good or wonder how many months ago the chivda was made and packed. So every now and then when I have cravings, I just make them at home so that I can share it with my kids.That way they can't question me "if outside chivda is unhealthy, then why are you eating? "
Also, the other thing is some of these chivdas such as the Poha Chivda are so easy to make that all it takes is 10 minutes! Seriously, that is easier than dressing up and going to the grocery store to get some! That's what I call win-win!
Disclaimer: Approximate Nutritional information is provided as a courtesy and can vary depending on the exact ingredients/brands used. If you have health issues, please work with a registered dietician or nutritionist.
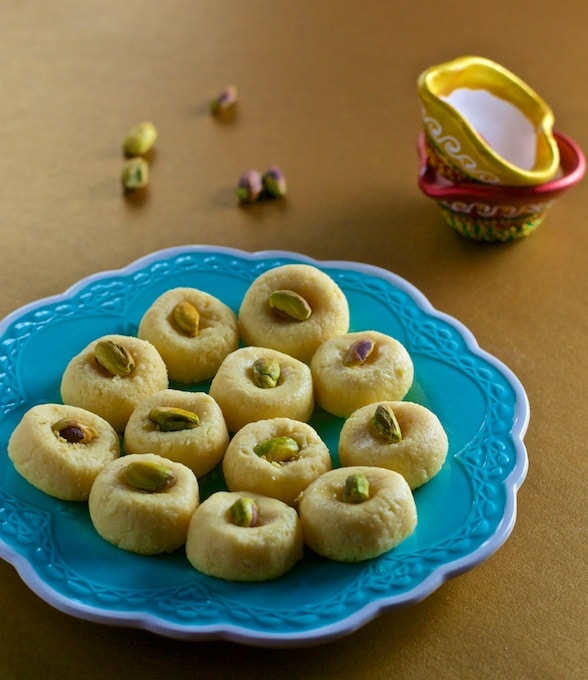
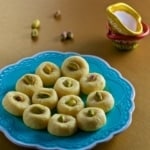
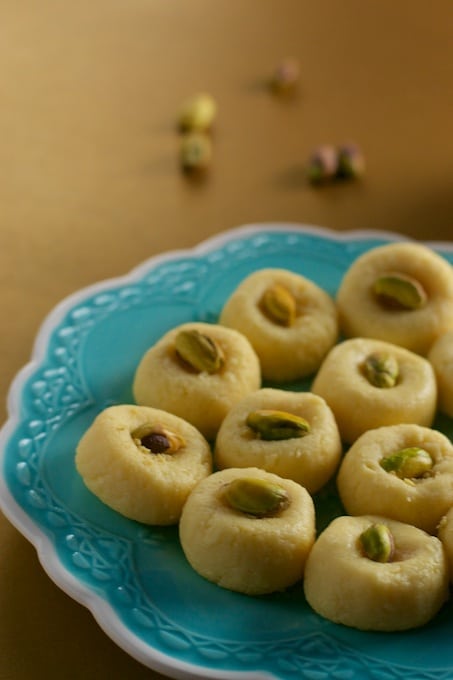
I pretty much love anything that is sweet and I can probably make a dozen Milk Pedas disappear in no time. Fortunately for me, I have a recipe that helps me make these awesome Milk Pedas with less than 5 minutes (the cooking part I mean). Don't believe me? Go ahead, read the recipe first and thank me later 😉
Disclaimer: Approximate Nutritional information is provided as a courtesy and can vary depending on the exact ingredients/brands used. If you have health issues, please work with a registered dietician or nutritionist.
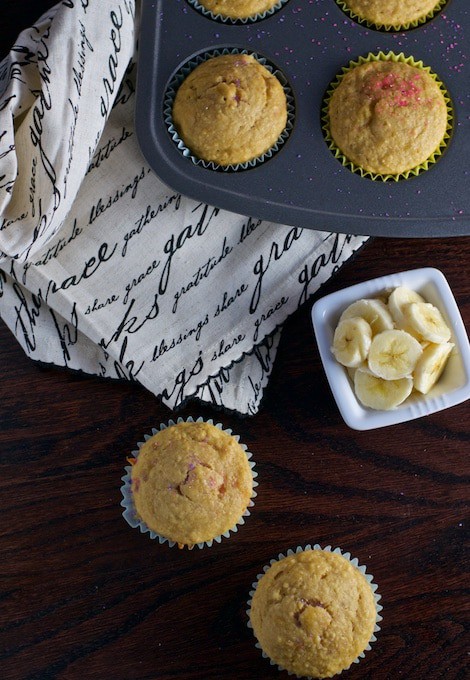
I like to think that I made muffins a whole lot healthier by altering the basic muffin recipe that I had by making these substitutions -
1) Butter with oil
2) Sour cream with yogurt
3) Reduced the quantity of whole-purpose flour (maida) quantity by half by replacing it with oats and whole wheat flour.
It was supposed to be an experiment, and I was surprised that the resultant Banana Oat muffins were so soft and spongy! Plus, bonus points to me for using up the quick oats that have been lying around for some time now.
Note: To turn quick oats into oat flour, pulse the oats until they are ground into a powder-like consistency.
Disclaimer: Approximate Nutritional information is provided as a courtesy and can vary depending on the exact ingredients/brands used. If you have health issues, please work with a registered dietician or nutritionist.
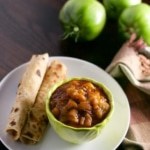
Hare Tamatar Ki Sabzi - a sweet and tangy dish with green tomatoes as its base. Enjoy it warm with rotis or rice!
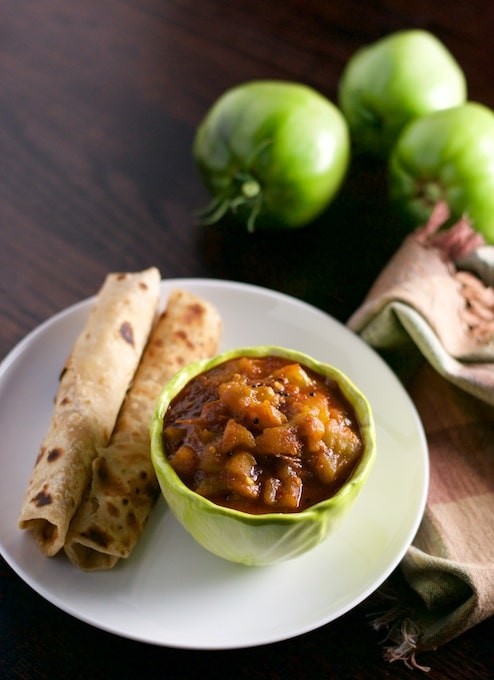
We had tons of tomatoes growing in our garden. Unfortunately, before they could ripen, they would get eaten up by slugs (I think). So with this batch, I decided to just pluck them raw and let them ripen on the counter. Meanwhile, a friend suggested making Hare Tamatar Ki Sabzi using these raw tomatoes.
I followed her recipe and in my opinion, the dish came out really well - spicy and tangy. The good thing about this recipe is you can easily substitute raw or green tomatoes with either apples or mangoes with similar results. Enjoy some warm rotis!
Disclaimer: Approximate Nutritional information is provided as a courtesy and can vary depending on the exact ingredients/brands used. If you have health issues, please work with a registered dietician or nutritionist.
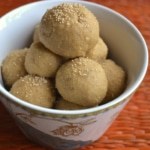
Besan laddoo - made from chickpeas flour, is a delicious treat that you pull together in under 30 minutes
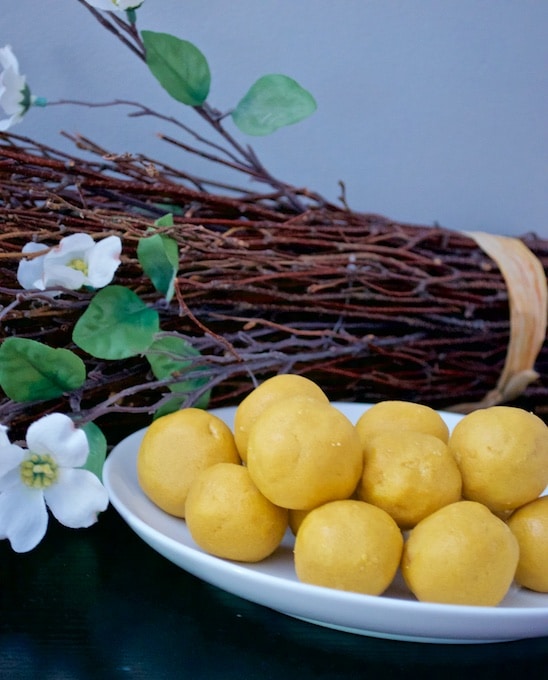
Growing up in Mumbai, I remember we used to exchange plates or platters of sweets with our neighbors during Diwali. I totally enjoyed this process since that meant that I got introduced to a large variety of sweets depending on where our neighbors originally came from.
When our neighbors dropped in with their plates filled with sweets, I would quickly glance through it to see if there was something I never had before. One such Diwali, I got introduced to Besan ladoos - these awesome ladoos made from chickpea flour, roasted in ghee, and mixed with sugar. Once I fell in love with them, there was no going back!
This weekend, I finally decided to try making these at home and realized they were even easier to make compared to the Godi and the Rava ladoos I have made in the past. Most ladoo mixtures need to be hot when you try to bind them into a ball, but not the Besan ladoos! I was able to make them even after they had cooled down a bit, and I appreciated that so much better than almost burning my palms while making other ladoos. Here's the recipe for these super awesome Besan Ladoos, and I hope you will make this during this Diwali or as a special treat for your family!
Disclaimer: Approximate Nutritional information is provided as a courtesy and can vary depending on the exact ingredients/brands used. If you have health issues, please work with a registered dietician or nutritionist.
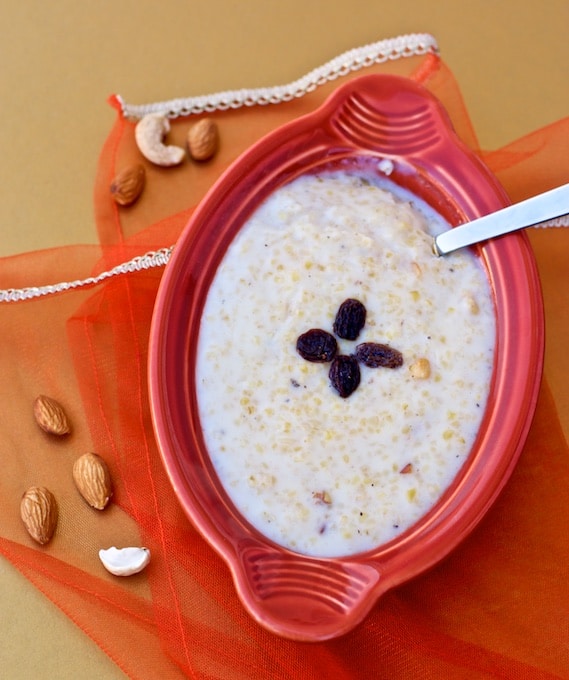
Sometimes I buy things impulsively, and if my husband were saying this, he would replace "sometimes" with "all the time." My one such find was cracked wheat at the neighborhood Patel Brothers store.
I thought maybe one day I could make Lapsi (a Gujarati dish made by frying cracked wheat in ghee and adding sugar and cardamom) for breakfast for my little ones. So I bought it, and it lay in my pantry for a month, waiting for my attention.
Every couple of months or so, I clean up my pantry, and when I did, I found this packet of Cracked Wheat or Fada and decide to make cracked wheat payasam - a dish I have been dreaming of ever since Ganpati festivities started. I remember first having it when during the Ganapati Celebrations in our building, some aunty had made the Cracked Wheat Payasam as an offering to Lord Ganesha. The Payasam was later distributed later to the baccha party (kids) and the uncle and aunties in the building. Here's my version of this recipe. Enjoy it as a dessert or for breakfast, as I did.
If you are looking for other easy-to-make desserts, here are my favorites -
Disclaimer: Approximate Nutritional information is provided as a courtesy and can vary depending on the exact ingredients/brands used. If you have health issues, please work with a registered dietician or nutritionist.
Love eggs? Try this Indian version of scrambled eggs (egg bhurji) loaded with onions and tomatoes, which makes for a perfect brunch or breakfast.

I could survive on Egg Bhurji and could eat it for pretty much every single meal of my life without getting bored. Unfortunately, we don't make Egg Bhurji so often at home (more like once or twice in the past decade we have been married) because my husband is still scarred from eating Egg Bhurji every single day that he lived in a hostel while studying for his engineering.
Once kids came along, they preferred Scrambled eggs over Egg Bhurji, and this dish got sidelined even further until I made a solo trip to Mumbai and my mother-in-law's neighbor - Mrs. Shinde, was kind enough to offer this tired and weary traveler some home-made Rotis and hot Egg Bhurji. That made me realize how much I missed it!
Once back home, I decided to introduce my kids to this dish, and while my younger one was disappointed that it was not the scrambled eggs she loved, the older one totally devoured it! Now, I know who got my genes ;-). Anyways, Egg Bhurji makes a great breakfast, and I love the fact that you can't go wrong with this; you know what, if your omelette breaks while you're flipping it, turn it into a Bhurji recipe - no one will know ;-).
Disclaimer: Approximate Nutritional information is provided as a courtesy and can vary depending on the exact ingredients/brands used. If you have health issues, please work with a registered dietician or nutritionist.

Most weekends, my husband makes fish on Saturdays, and I make Kori Gassi on Sundays, and we have been following this schedule for a while now. My husband takes great pride in making the gassi be it Mackerel (Bangude), Sardines (Bhutai), or good old Tilapia.
But this weekend, we had a situation - the masala that Maami (my mother-in-law) had made had run out and my husband wasn't sure how to make the base masala. I very kindly shared with him the recipe for Kundapur masala powder, but he was running out of time as cleaning the Sardines was taking time so he asked me to help out. I promised to, but on one condition - I would do everything myself (so that I could post the recipe here ;). He didn't seem particularly thrilled with the idea because he thought I wouldn't make the gassi as well as he makes (REALLY??), but I stuck to my ground, and finally, after "trying" to micromanage the cooking process, he gave up and let me do my own thing. The resultant Bhutai Gassi was phenomenal. Though he did not admit to it, and when I pushed him for his feedback, he mumbled something like "one of the best" I have had so far, I will go as far as to say that it was better than the ones he makes (Shh!! don't tell him, I said that).
Disclaimer: Approximate Nutritional information is provided as a courtesy and can vary depending on the exact ingredients/brands used. If you have health issues, please work with a registered dietician or nutritionist.
This aromatic and delicious laddoo is a perfect after-school snack for kids! Learn how to make this sweet treat in less than 30 minutes.
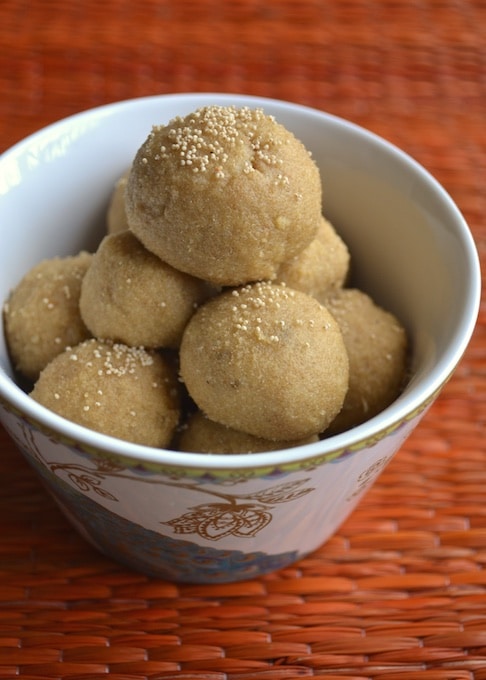
My kids love to chomp down biscuits/cookies for the evening snack. While that is an only indulgence or junk food that they are allowed, I was still not happy about it and started to look for alternatives and that's when mom suggested making laddoos!
I know they loved the Rava laddoos I made a few months ago, so I decided to experiment a little and try another type - Godi laddoo or Wheat laddoo. These laddoos are made out of 3 key ingredients - wheat, ghee, and sugar and you can make them in less than 30 minutes. This was my first time making them and I thought they came out pretty well. My little one agreed as well and confirmed by eating 2 laddoos without waiting for them to cool down and then asked for more :).
Disclaimer: Approximate Nutritional information is provided as a courtesy and can vary depending on the exact ingredients/brands used. If you have health issues, please work with a registered dietician or nutritionist.
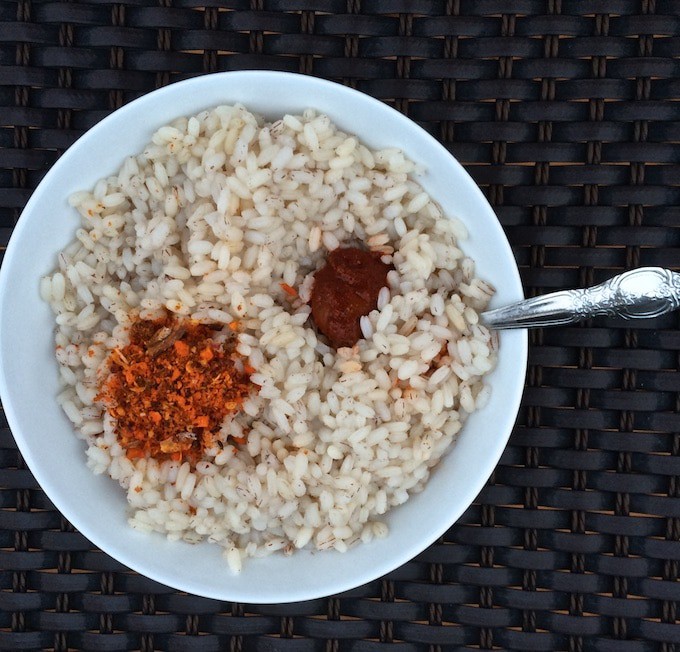
As a kid, I never liked brown rice and I would dread the trips to our ancestral home in Mangalore since they did not serve any white rice. I do remember throwing a fair amount of tantrums before every meal because I didn't want to eat brown rice. Fast forward like 30 years later, I have become a huge fan of brown rice, though I don't eat the polished rice a lot. During my recent trip to Mangalore, I got some brown rice to introduce it to my kids. I was not sure, how they will react but was hoping for a better reaction than I gave my mother. Instead of draining the water after the rice is cooked, I decided to make some Ganji for them with this brown rice. Ganji is made by cooking brown rice or oorpel ari as they call in Mangalore in large amounts of water till the rice has softened significantly and some starchy water remains which is called as Teli. This Teli is considered to be highly nutritious and often serves as food for those who are sick and babies since it is highly digestible. Ganji is best served with meen (fish) chutney and mudi uppad ( pickle) and if you want to go all the way - a dollop of ghee would be even better.
Disclaimer: Approximate Nutritional information is provided as a courtesy and can vary depending on the exact ingredients/brands used. If you have health issues, please work with a registered dietician or nutritionist.
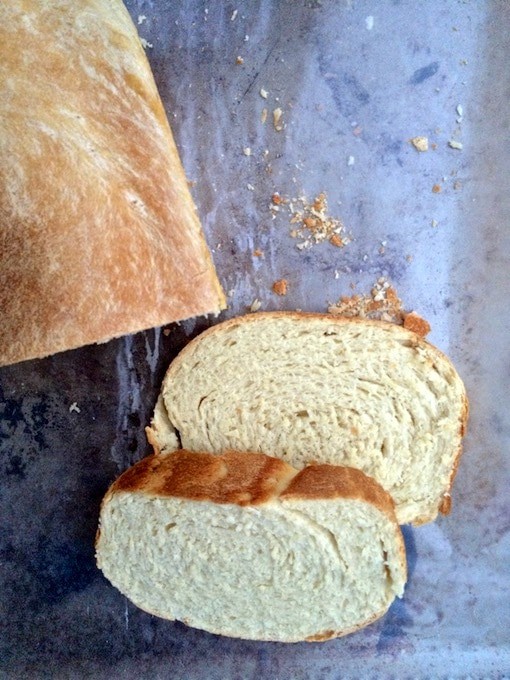
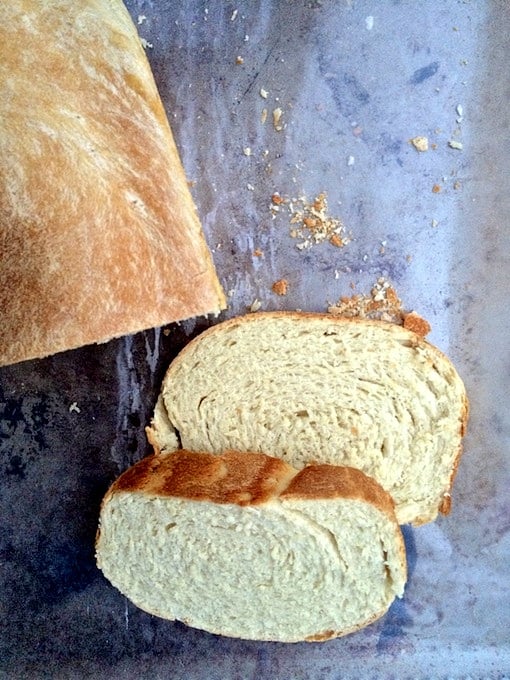
I was at the grocery store and a local bread company was giving away samples for their organic, non-GMO bread. While, I love those chocolate samples, I was not in the mood to try out some bread but they called out to me and asked me if I wanted a sample. I felt odd just walking away so I took a sample and when I tasted it, I immediately could tell the difference. I read the ingredient list and there were like 6-7 ingredients that were used in the making of this bread and ALL that you could recognize. We try to follow this rule while buying 'most' of the grocery products - if we recognize the ingredients we buy it. There were a few exceptions to the rule when it came to bread and croissant and sometimes store-bought birthday cakes but for the most part, we like to stick to that rule. Anyways, coming back to the bread, once you taste the good stuff, you don't want to go back. So, while I bought the bread, I decided to bake my own as well and here's the result of my experiment.
Disclaimer: Approximate Nutritional information is provided as a courtesy and can vary depending on the exact ingredients/brands used. If you have health issues, please work with a registered dietician or nutritionist.
Buttermilk dosa - Delicious and soft, this dosa is perfect for breakfast, snack, and even lunch. Learn how to make it in a few easy steps.
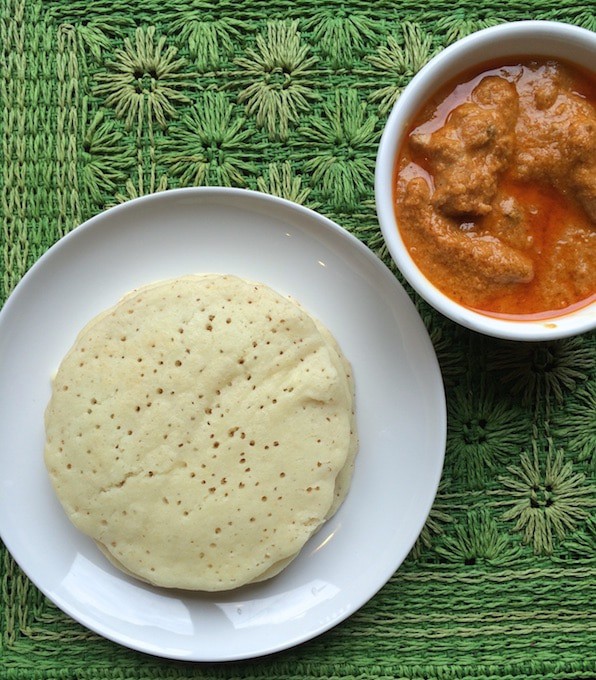
A trip back to India is always refreshing and rejuvenating - especially if you get to make one without kids ;).
It gives one time to think, eat peacefully, and also to pick your family's brains for recipes without getting interrupted.
I was able to make one such trip recently and came back with loads of recipes! The first one I posted during my visit was for these amazingly soft Kappa Ruttis, which my mom shared with me. The other dish that I enjoyed having and making the most was Buttermilk dosa, and it comes from one of my favorite aunts! Thanks, Prema Aunty, for the recipe, for making these soft dosas for me, and also, for guiding me through this process and providing feedback till I got it right.
Note:
Hope you liked this buttermilk dosa recipe, and if you are looking for easy and delicious breakfast recipes, here are my top picks
Disclaimer: Approximate Nutritional information is provided as a courtesy and can vary depending on the exact ingredients/brands used. If you have health issues, please work with a registered dietician or nutritionist.
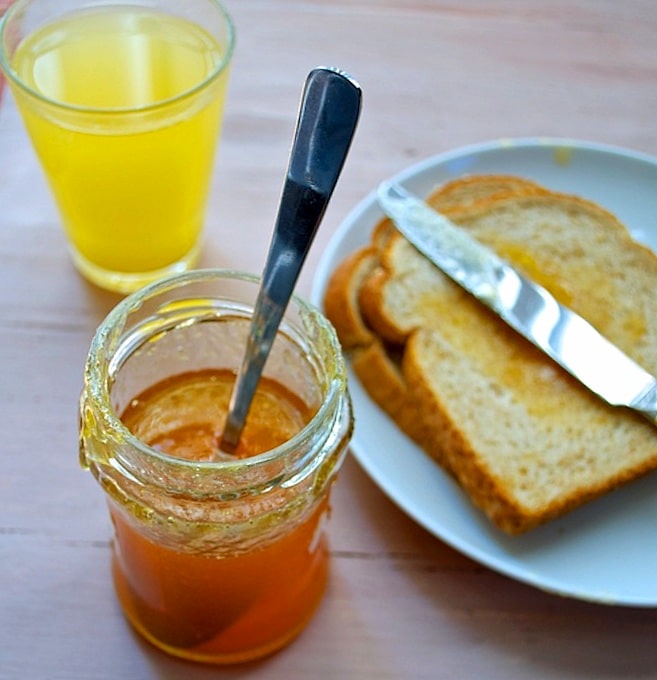
During the hot summer months in India, after playing for hours in the sun, I would always look forward to a glass of cold Kissan Squash. I have been wanting to try my hand at making squash at home ever since the temperatures started to soar here and found the perfect opportunity when I noticed we had a lot of leftover pineapple slices in the refrigerator. They weren't very sweet and kinda bland, so there weren't being consumed so I decided to turn them into squash before they went bad. When I looked for recipes on the internet, they needed pineapple essence, citric acid, sodium benzoate - not ingredients that one would typically have at home. So I decided to skip all of them and go with only two ingredients - pineapple and sugar and much to my delight, that was all I needed to make Pineapple Squash. The best thing about this recipe is if you let the squash mixture thicken further, you can make Pineapple spread or jam out of it - which is what I did! [Read more...]
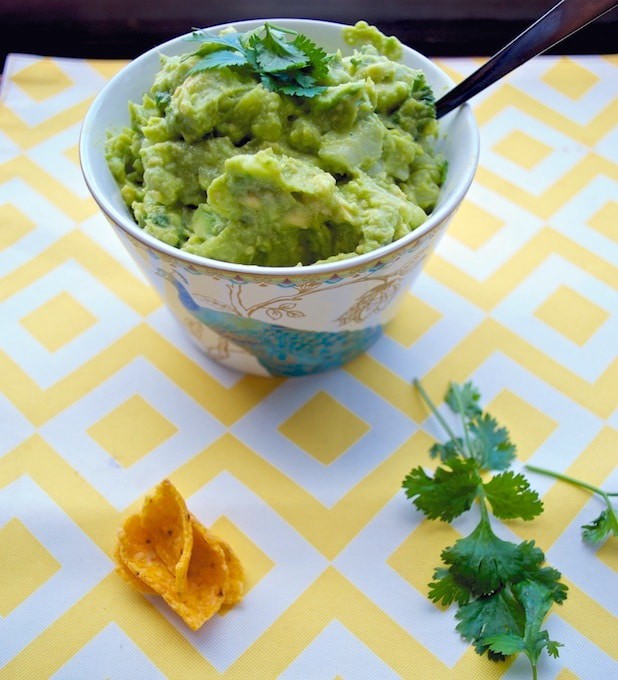
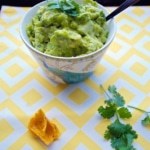
When I was in grad school, money was tight and there were only few restaurants that I could afford to frequent and one of them was Chipotle. I loved their Burritos and Fajitas since they were so filling but was bummed that they would charge extra for Guacamole - the creamy spread made from Avocados. More often than not, I would have to skip adding it to my Burrito but when I did, it felt like a King's meal. Fast forward, a decade later - I usually get this spread from Costco but I decided to make it at home this time. When I tried to look up the recipe on the internet, I found one on the Chipotle website and decided that was it! No more searching. This time I cannot say adapted from so and so website - simply because I did not want mess with the original. I did not have jalapeno peppers so I substituted it for thai peppers with the same result. If you follow the recipe, you will realize it is such a simple one and I can't believe I waited a decade to make this at home. Better late than never! 🙂
To give it a different spin, I would recommend adding a clove of garlic, finely crushed and finely cut tomatoes, after they are seeded. Enjoy with some tortilla chips or as a creamy spread to your sandwich!
Disclaimer: Approximate Nutritional information is provided as a courtesy and can vary depending on the exact ingredients/brands used. If you have health issues, please work with a registered dietician or nutritionist.

For the first time, we still had leftover Mangoes from making Mango ice-cream and also, from eating them every day in the evening. I have never made Mango milkshake from the pulp, it has always been from the store-bought pulp simply because we hardly ever have leftover Mangoes. This time we had because we saved the ones in a remote corner of the refrigerator and they were forgotten for a few days until it was time for weekly purging of the refrigerator. I debated what to do with it but since it was time for breakfast, I thought this would be a good accompaniment to the warm idlis we were having. Homemade Mango pulp is always way better than store-bought one and once you make your milkshake from home made pulp, it is always difficult to go back to the store-bought one.
Note: The best kind of Mangoes to use for milkshakes are the ones without fibre but if you have a fibrous Mango, you can always strain the puree before mixing in the milk and sugar.
Disclaimer: Approximate Nutritional information is provided as a courtesy and can vary depending on the exact ingredients/brands used. If you have health issues, please work with a registered dietician or nutritionist.

There are two things that we look forward to during our Mangalore trips - one is Gadbad and the other is piping hot Goli Bajes! They are primarily made of maida and yogurt and have a crispy exterior and a soft center and are usually deep fried in oil but since I am a huge appe pan, I decided not to deep-fry. Not sure how it would turn out, I was surprised to find that they were equally good as their deep fried version! The exterior was not as crispy but considering I used oil only for greasing the appe moulds and it has not been dunked in oil, they turned out pretty awesome! If you don't have an appe pan and decide to deep fry it, the recipe should stay the same!
So here's the recipe for Goli Baje for you to enjoy during the monsoon season or whenever you feel like it 🙂
Disclaimer: Approximate Nutritional information is provided as a courtesy and can vary depending on the exact ingredients/brands used. If you have health issues, please work with a registered dietician or nutritionist.

In my view, you need three things to get a Waffle right - a good recipe, the right Waffle iron and a little bit of patience. You need patience because, with most waffle irons, you need to use it for a few times before it starts browning your waffle evenly. Didn't get it right the first time? Hang in there..with a few tries you should be all set. Make sure to follow the manufacturer's directions to the T, I ruined my first waffle iron by using cooking spray because I didn't read through the instructions - ugh!.
After a recent trip to Boyne mountain, I fell in love with Waffles again and decided to buy a new waffle iron and end up with Hamilton Beach Waffle Iron after I found out that I could remove the grill plates for cleaning plus the review was great! So far so good and I love it. Now that I have shared with you the details around the Waffle Iron I use, here's the recipe. I adapted this recipe from AllRecipes.com and made a few changes such as replaced half of the all the purpose flour with whole wheat flour and increased the amount of sugar slightly. I wasn't sure how the recipe would turn out after adding whole wheat flour to the mix, but to be honest, I didn't notice the difference and maybe next time, who knows I will be brave enough to make waffles with only whole wheat flour. For now, here's the recipe for some yummy Belgian Waffles - serve warm with whipped cream and maple syrup (make sure you buy the pure organic one with no cane sugar - you will notice the difference in taste immediately) [Read more...]
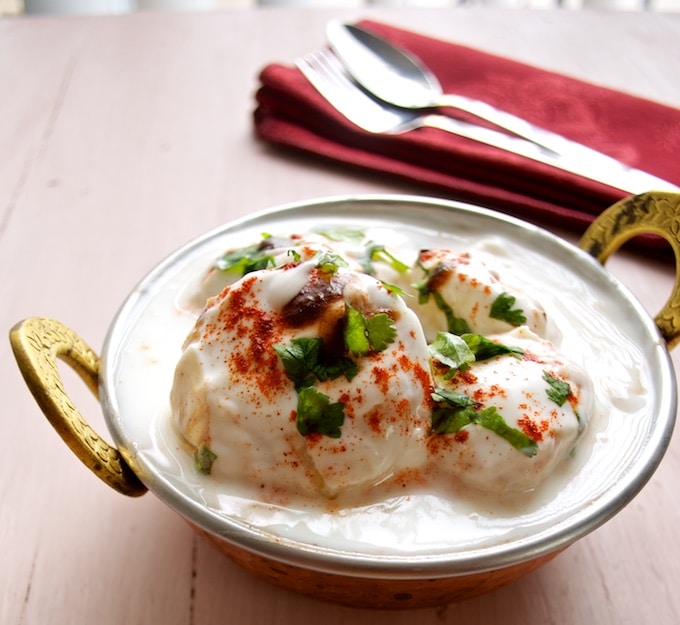
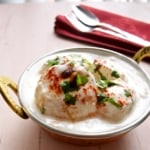
A lot of memories from my childhood are around food and every time I eat Dahi Vada, I always think of a time when we used to visit the Shani temple in Matunga quite often. The best part of the trip were our visits to Anand Bhavan - a South Indian joint near the King Circle flyover, where I would always order Dahi Vadas. Dahi Vada also called as Dahi Bhalla is prepared by soaking vadas or lentil dumplings in yogurt. The yogurt they served at Anand Bhavan had this silky texture from being well beaten and the vadas would be so soft that they would just melt in your mouth. These vadas are typically deep fried and put in water to soak for 15- 20 minutes to soften them. Vadas are then squeezed between the palms to get the water out of them and then they are transferred into the mixture of sweetened yogurt. Coriander leaves, chilli powder, crushed black pepper, cumin powder are sometimes used for garnishing along with a combination of coriander and tamarind chutneys.
After I moved out of Mumbai, all I could was day dream about these vadas but could never get myself to make it because I am not a big fan of deep frying..so never dared to make Dahi Vada at home, until I bought this appe / appam pan! I don't have to deep fry anymore and all I need is a teaspoon of oil to fry them! I am so making them over and over again..Life is good 🙂
Disclaimer: Approximate Nutritional information is provided as a courtesy and can vary depending on the exact ingredients/brands used. If you have health issues, please work with a registered dietician or nutritionist.
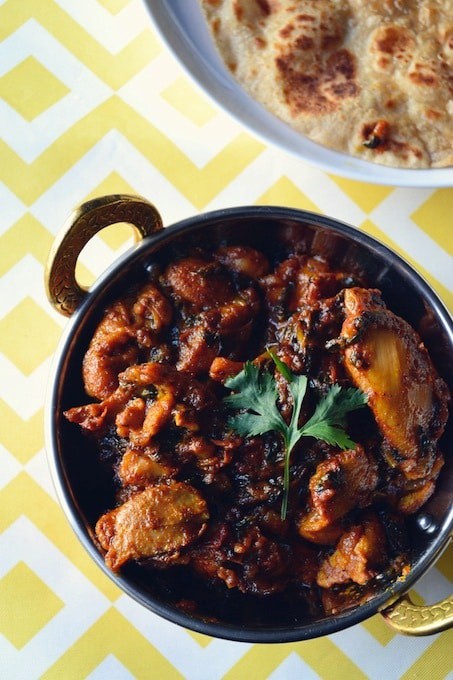
Here's a quote I love - In character, in manner, in style, in all things, the supreme excellence is simplicity.That is how I will describe this dish - Chicken Saag. I think this is probably my best recipe yet - simple to make yet exotic to taste. I think I will stop here and let the recipe do the talking...
Note: You can definitely increase the quantity of the spinach to get more greens into your dish. This recipe is more chicken and less saag.
Disclaimer: Approximate Nutritional information is provided as a courtesy and can vary depending on the exact ingredients/brands used. If you have health issues, please work with a registered dietician or nutritionist.

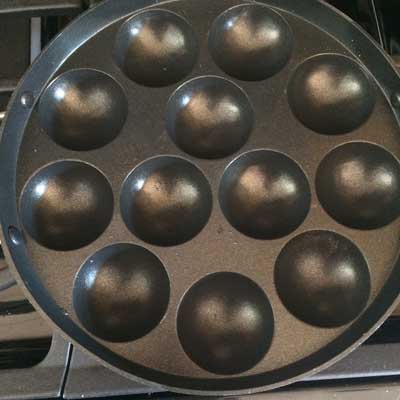
I have been yearning to make Guri appa ever since I bought this Appam pan from Amazon, and I finally got a chance today. I was so excited to make Guri appa that I woke up really early in the morning (6.00 AM on Sunday is really early for me :)).
Anyways, Guri appa brings back some really sweet memories of my dad getting these appa's from the Mangalore store and me hogging more than half of them, and my dad more than willingly gave me his share as well. Good old days! The good thing about this recipe is that it makes 48 of these appas, more than enough for everyone 😉
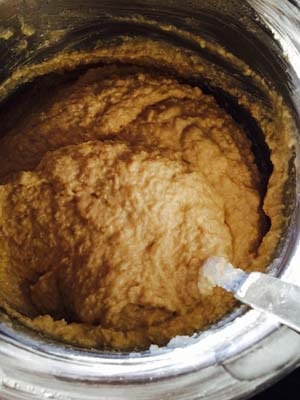
Guri appas are very easy to make and getting the batter to the right consistency probably takes the longest time. I used a stone grinder to get the batter to a thick fine consistency (see pic below). You can always use a blender, but you will have to grind the batter in batches.
Appam Pan - 12 cup
Disclaimer: Approximate Nutritional information is provided as a courtesy and can vary depending on the exact ingredients/brands used. If you have health issues, please work with a registered dietician or nutritionist.
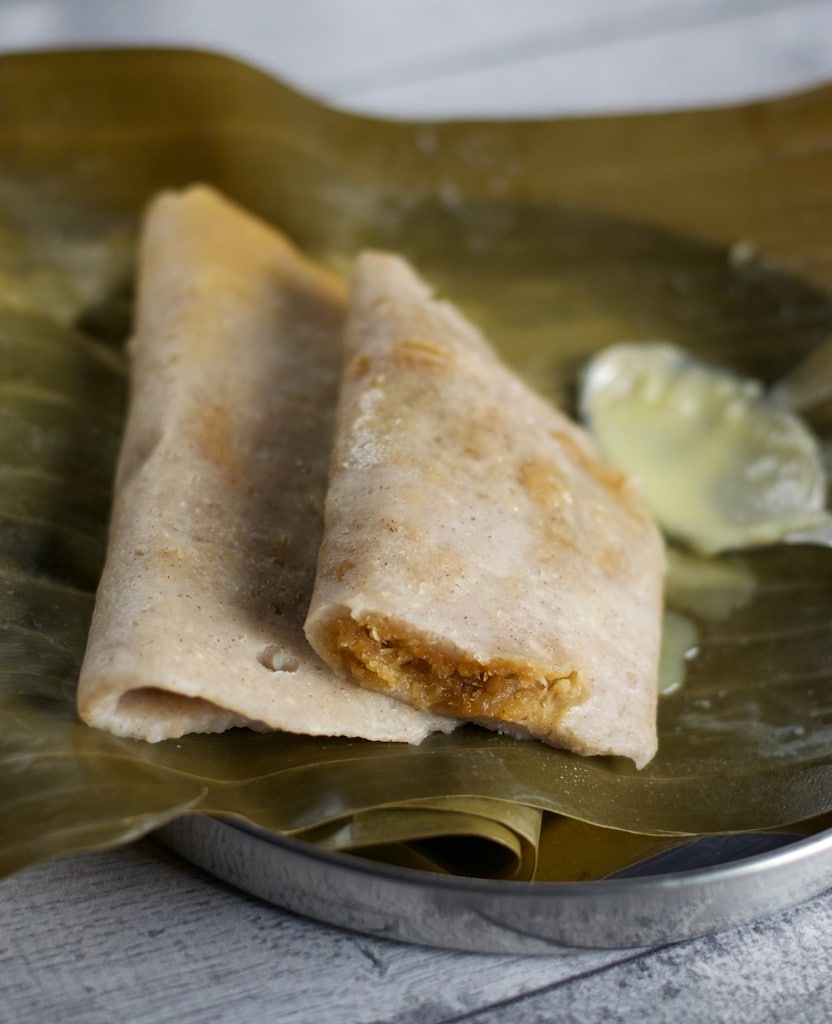
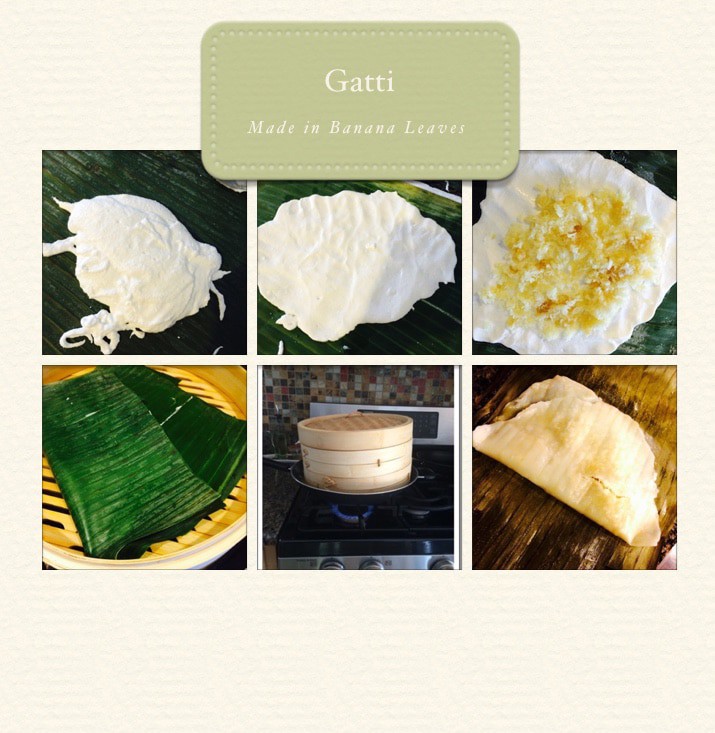
Gatti or steamed rice dumplings is a Mangalorean dish made of brown rice, jaggery, and coconut. Gatti is usually made using turmeric leaves but since I could not find them, I was forced to use Banana leaves. This sweet dish is usually made during Diwali but I can pretty much eat this every single day! If there were two dishes I had to pick from Mangalore that I can't live without they would be Kori Rutti and Gatti. It is a very simple, straightforward recipe and I don't see anyone going wrong with this. Make sure you look at the step -by- step pictures below to get a feel for the consistency of the batter. Note: When I first posted the recipe, I had used idly rice. But I would strongly recommend using brown rice for optimal taste.
Disclaimer: Approximate Nutritional information is provided as a courtesy and can vary depending on the exact ingredients/brands used. If you have health issues, please work with a registered dietician or nutritionist.
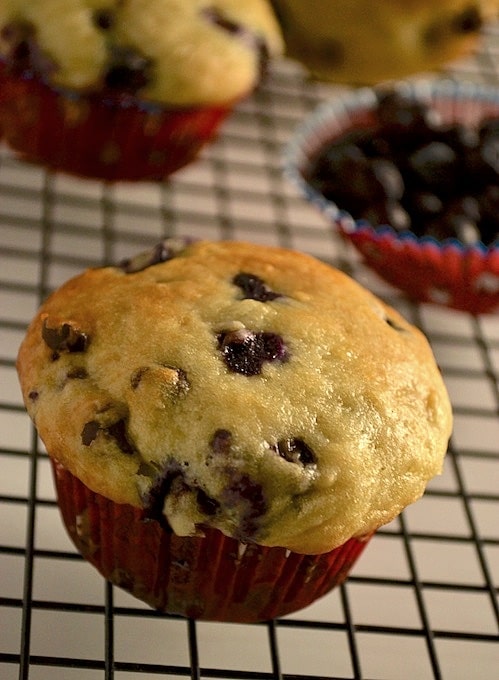
Blueberry Yogurt Muffins - What is great about this recipe is
Don't believe me - try for yourself! The recipe has been adapted from the Blueberry Yogurt Recipe from Taste of Home.
Disclaimer: Approximate Nutritional information is provided as a courtesy and can vary depending on the exact ingredients/brands used. If you have health issues, please work with a registered dietician or nutritionist.
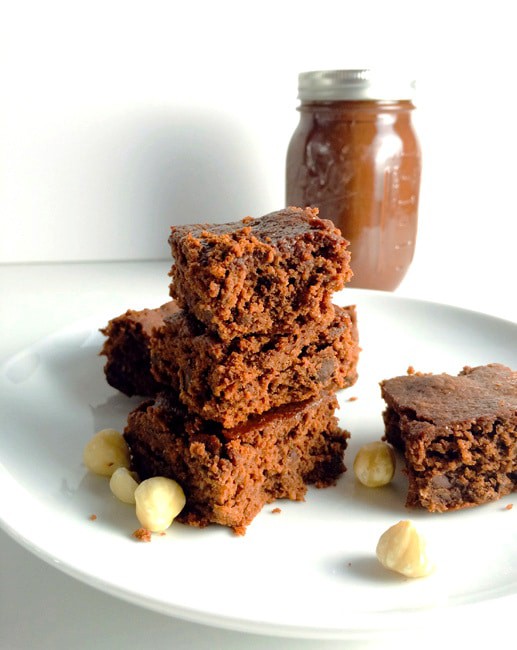
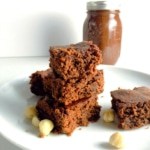
I continued my quest of cleaning up the kitchen pantry this week and found these two ingredients that have been awaiting my attention - Quick oats and hazelnuts. I remember buying quick oats to make energy bars but never got around to doing that and the hazelnuts were bought with the intention of turning them into Hazelnut butter but by the time I was ready to make the second batch of Hazelnut butter, my daughter had moved on to Peanut butter. So here I was wondering what I could do with both these ingredients and I vaguely recollected reading a recipe for Almond Butter-Quinoa Blondies using Quinoa flour. That was it, I decided to replace the Quinoa flour with Oat flour and almond butter with hazelnut butter and make some brownies. Sounds like a disaster of a recipe, right? At least it did to me. But I was wrong, so wrong! The Oats -Hazelnut butter brownies turned out to be AMAZING! It was so soft and spongy and my daughters LOVED it. Pardon my caps but I am still blown over on how wonderful they turned out to be. Go ahead and try it out and let me know how they were.
Note: To turn quick oats into oat flour, pulse the oats until they are ground into a powder-like consistency.
Disclaimer: Approximate Nutritional information is provided as a courtesy and can vary depending on the exact ingredients/brands used. If you have health issues, please work with a registered dietician or nutritionist.
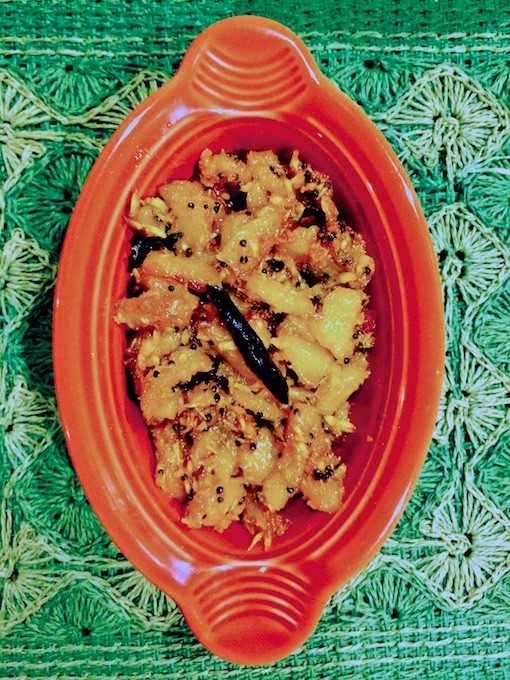
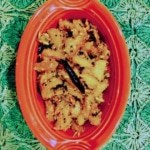
We had some left over Pineapple lying around in the fridge and since it wasn't particularly sweet, it wasn't appealing to the audience at home. I didn't want to throw it out and I had a few options - Pineapple Lassi or Pineapple Raita. Both of these options did not evoke any interest so I had to look for another. The only other recipe that came to my mind was Pineapple Menaskai - Pineapple cooked in coconut curry..gosh the very thought of it makes me salivate. Unfortunately, it was a long day and I didn't have the energy nor time to go the whole nine yards and make a curry so I came up with something very similar in taste but instead of a gravy it is a side dish or a subzi - my very own version of Pineapple Bhaji..Ta-Da!
Disclaimer: Approximate Nutritional information is provided as a courtesy and can vary depending on the exact ingredients/brands used. If you have health issues, please work with a registered dietician or nutritionist.
These soya chunks biryani are a true delight! Try this recipe to make this delicious rice dish that will wow your family!

I found a box of Nutrella Soya Chunks in the pantry. I had never experimented with Soya before, and the one time my husband tried to make something out of it, it was a disaster. Since that happened a few years back, I think he forgot all about it, and he had gone about buying yet another packet of Soya Chunks last year 🙂
So here we were, wondering what to make out of it. Biryani is what came to my mind, and since I had a good Shrimp Biryani recipe, I decided to follow the recipe. We were delighted at the outcome and have decided that this recipe of Soya Chunks Biryani is a keeper.
By the way, Soya chunks match the protein content of meat and are considered a meat extender. While they are super easy to make, here's something you need to remember - Soya chunks need to be repeatedly rinsed at least 3-4 times after being boiled; otherwise, you will find your dish ruined because the soya chunks tasted weird.
Disclaimer: Approximate Nutritional information is provided as a courtesy and can vary depending on the exact ingredients/brands used. If you have health issues, please work with a registered dietician or nutritionist.
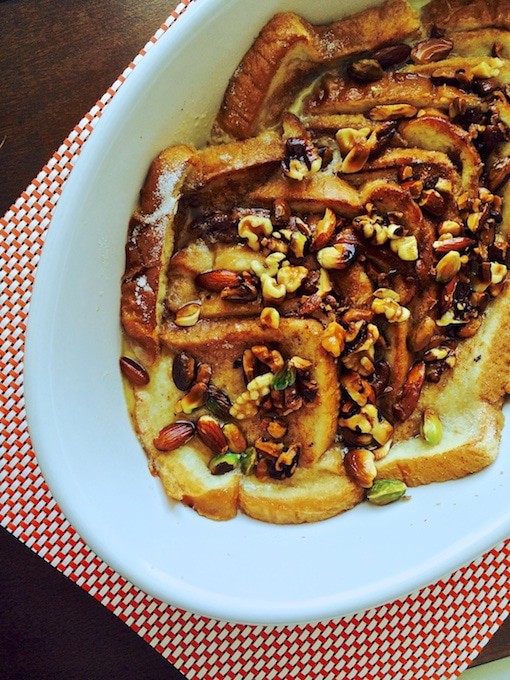
I first tasted Double Ka Meetha or Shahi Tukda in a Chicago restaurant called Vishnu Vilas (check this place out if you are looking for a South Indian buffet - amazing food!). I had never heard of Double Ka Meetha before and since that was the only dessert they were offering that particular day - I had to give it a shot to cater to my sweet tooth cravings. It was YUM but I had no idea what it was made of - it felt like a concoction of Sheera and Rabdi.. little did I know that it was made of Bread!
Double Ka Meetha aka Shahi Tukda is a traditional Hyderabadi dessert that is made from deep frying bread in ghee and then soaking them in sugar syrup and reduced milk. My recipe is slightly different but yields the same results but without deep frying bread or using sugar syrup. Here's how - check out my microwave version of Double Ka Meetha.
Disclaimer: Approximate Nutritional information is provided as a courtesy and can vary depending on the exact ingredients/brands used. If you have health issues, please work with a registered dietician or nutritionist.
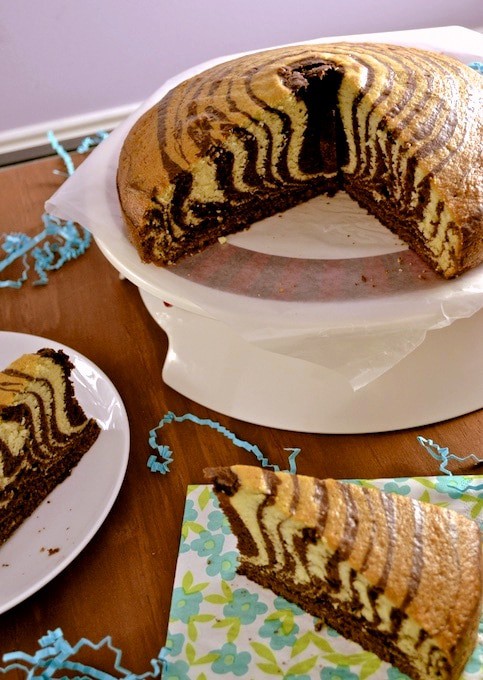
This delicious-tasting and gorgeous-looking Zebra cake is a must-make in my book. Tastes great with coffee!
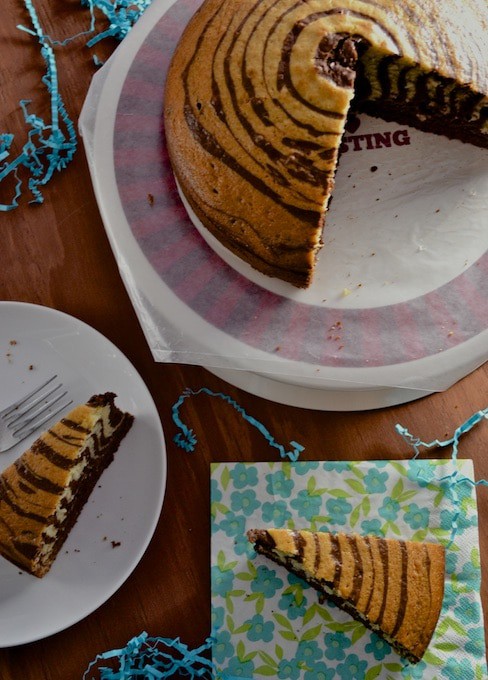
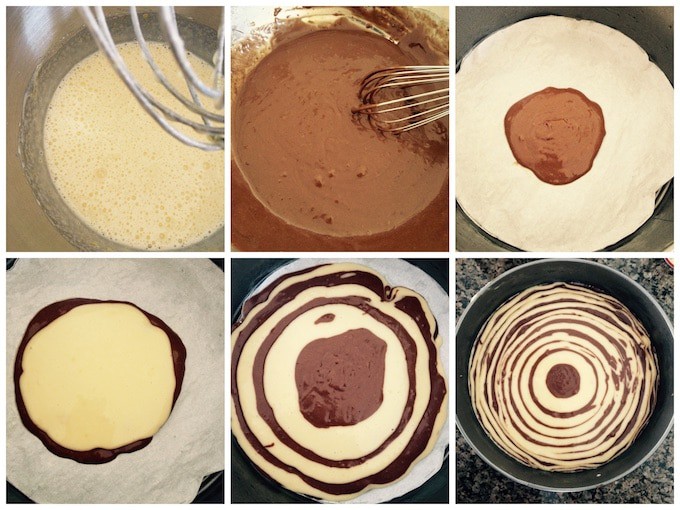
What do you think is the key ingredient for this recipe of Zebra cake? One thing that you would absolutely need to make this AWESOME cake. Flour? Cocoa? Baking powder? Yes, we do need all of these, but one thing ranked higher, and that was patience.
I will happily admit when it comes to cooking, I like to be in and out of the kitchen in less than 30 minutes or less, so when I read this recipe almost 4-5 years ago, I was intrigued but not tempted enough to make it.
This year has been different so far, and I am pushing myself to get out of my comfort zone more and more, and for some reason, this recipe was beckoning me this week. So I decided today was the day when I would take on the challenge, and I SUCCEEDED!
This was in spite of me running out of baking powder and my 2-year-old pouring water on my greased cake pan (thank goodness! The batter wasn't in there).
In the end, all's well that ends well. Give it a shot - and don't forget to keep patience in your back pocket just in case you need it.
This recipe has been adapted from Fae Magazine.
Disclaimer: Approximate Nutritional information is provided as a courtesy and can vary depending on the exact ingredients/brands used. If you have health issues, please work with a registered dietician or nutritionist.

More often than I would like to admit, I hesitate to enter the kitchen for the fear of dealing with the aftermath - cleaning the dishes, floor, oven etc..This week was particularly long (traveled for the first time for work) and when I came back from work on Friday, I noticed that my daughter was lying in wait armed with a couple of over-ripened bananas and I knew exactly what she had in mind - Banana bread.
While cooking was the last thing on my mind, the idea of warm Banana bread was enticing along with with the fact that it was a great opportunity to connect with my munchkin after almost a week. The recipe I followed has been adapted from the blog - Simply Recipes and is easy, straight forward and you can't wrong unless your baking soda is more than 6 months old. The end result was a moist, mildly sweet Banana bread that you can have as breakfast, an after school snack or warmed up and served with some vanilla ice-cream for dessert.

Every Saturday morning, my soon to be eight year old asks me if she can have pancakes for breakfast and I hesitate..While I love pancakes, I have always had issues making them such as the pancake is not cooked through or it is too brown (read burnt) and it was nothing like the ones that they make at IHOP :(. So it came to a point where I used to dread making them..but one day (which is today), I decided enough is enough and it was time to do some full-on research on how to make the perfect golden-brown pancakes and I found out that the key ingredient that was missing in the recipe that I had was PATIENCE 🙂 and also the fact that pancakes need to be cooked at medium to low heat.
Here's a checklist I have put together based on my experience and from doing my research on good old Google.
Found these pearls of wisdom from the following websites - Bon Appetit and Aunt Jemima.
That's all I have. Go ahead, give it a try and make some soft, fluffy and melt in the mouth pancakes.
The recipe is adapted from these two websites - Allrecipes and Oh, sweet basil.
[Read more...]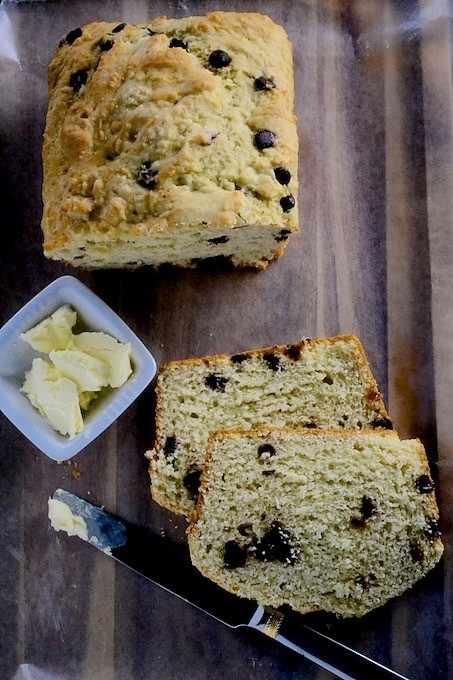
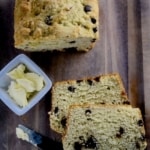
Anyone can make Irish Soda bread at home! No baking skills are required. I say that because I have never made bread before, and all this recipe needs is 5-6 ingredients and 5 minutes of your time, and the oven does the rest of the work. Sounds great, doesn't it? At least to me 🙂
We had this bread every day for breakfast until it ran out. It is soft and moist, like Banana bread, and tastes heavenly with butter. As far as the mix-ins for this bread are concerned, most people add raisins, but we chocoholics went for semi-sweet chocolate morsels.I will always be eternally thankful to AllRecipes magazine for introducing me to this recipe.
One last thing: it is called Soda bread because we use baking soda as the leavening agent instead of yeast.
Go ahead and try this recipe! The only thing I would like to add is to make sure your baking soda is not more than 6 months old.
Disclaimer: Approximate Nutritional information is provided as a courtesy and can vary depending on the exact ingredients/brands used. If you have health issues, please work with a registered dietician or nutritionist.

I am excited how this year is coming along. I learned 2 new things out of my big list of items that I planned to ahem..master this year ;-).
The first being chess and the next one..you guessed it.. Chicken meatballs. I have been wanting to make Chicken meatballs forever now but I always thought it is a painful process and would involve deep frying.. who knew you could make like 40 Chicken meatballs in under 30 minutes! Here's the recipe adapted from the Allrecipes magazine. Enjoy!
Note: This recipe is perfect for kids. It is NOT spicy. These Chicken meatballs pretty much melt in the mouth and my two year old loved it. Feel free to add more sauce to increase the spice quotient. And the recipe does not need any added salt.
For days when ordinary coffee just won't do, here's a recipe for Desi Cappuccino for that special occasion.

I was never much of a caffeine addict, but an Emirates flight changed everything. I was very excited about the trip and the opportunity to fly with Emirates and stopover in Dubai. I had heard great things about Emirates, but little did I expect to see chicken served in a Vegan meal. I let that go, and then I noticed that the breakfast that they served consisted of 3 vegetable entrées - Rajma, some kind of a kurma, and badly made peas.
After the second meal, I decided to stick to croissants and coffee for the rest of the journey, and I followed the same rule on the return trip as well. Though the Emirates experience was awful in more ways than one, the one thing that I learned was to appreciate coffee which led me to learn how to make Cappuccino the desi-way to feed my caffeine cravings. So for all you coffee lovers, here's my recipe for Desi Cappuccino!
Disclaimer: Approximate Nutritional information is provided as a courtesy and can vary depending on the exact ingredients/brands used. If you have health issues, please work with a registered dietician or nutritionist.
Check out this simple recipe for a chai latte and make your own at home. It is so much better than store-bought!
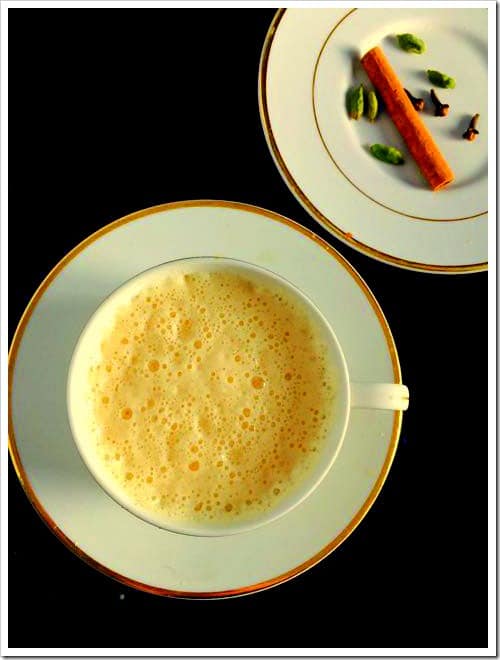
It is a typical winter morning, but the only thing different today..scratch that..the two things different today is I was able to make a perfect cup of Chai Latte, and I am typing this blog on my new Mac..(read struggling.) I will probably save sharing my struggles with you some other day..for today; I will focus on my Chai Latte. I am not much of a coffee drinker, but I can always enjoy a cup of Starbucks Chai Latte on a cold morning like today. If you are already a tea drinker and a maker, you can master this recipe in no time..all it needs is the Ikea stirrer and a few spices thrown in. Enjoy!
Disclaimer: Approximate Nutritional information is provided as a courtesy and can vary depending on the exact ingredients/brands used. If you have health issues, please work with a registered dietician or nutritionist.
Easy Rice Krispie treats for a Frozen birthday party!
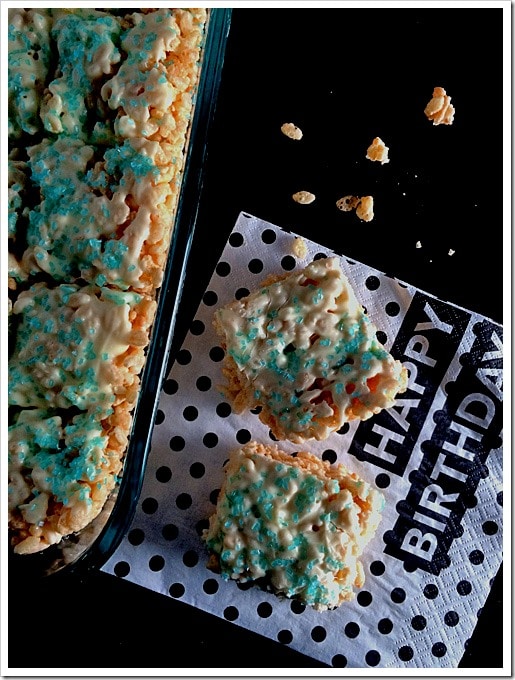
My little one turned two last week, and since she is a big "Let it Go" / Frozen fan, I decided to throw her a Frozen birthday party. While I ordered the cake, I decided to make a few munchies for the kids - Chocolate truffles and Rice Krispy Treats.
To get the theme colors of white and blue, I used white chocolate and sparkling blue sugar. While it is best served fresh, you can make this treat a day in advance. These treats were so easy to make that my 7-year-old made this with little help from me.
Disclaimer: Approximate Nutritional information is provided as a courtesy and can vary depending on the exact ingredients/brands used. If you have health issues, please work with a registered dietician or nutritionist.
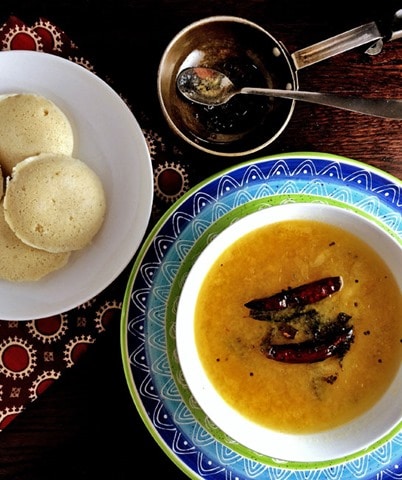
Going back to the roots - presenting a very simple and fulfilling recipe of Dal Tove - a very typical Mangalorean recipe.
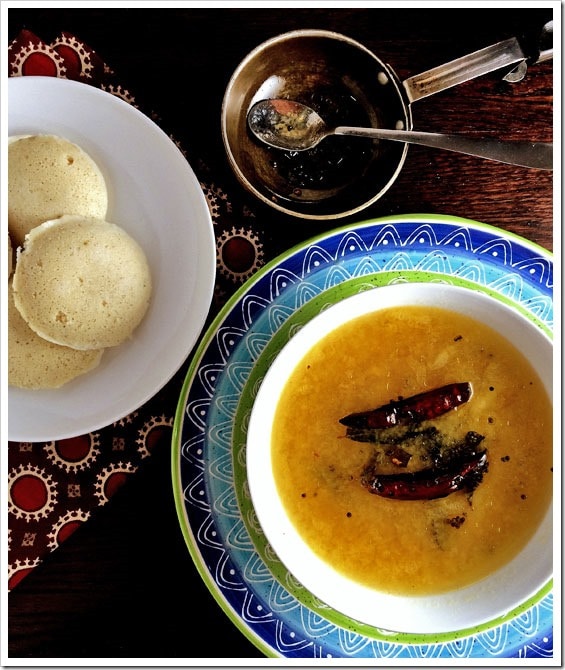
I will admit I did not know what Dal Tove was until this morning. We made some Idlies for breakfast and were out of grated coconut, so making coconut chutney was out of the question.
We could eat have paired our Idli(es) with honey, but that is not fun. Luckily for me, my mom is visiting us, and she said she will quickly make some Dal Tove to dunk the idlis in. Dal Tove is a very simple concoction of Tuvar Dal along with a few basic ingredients that you would find in your kitchen, such as green chilies, turmeric, mustard seeds, and water. When I tasted it, it reminded me of the dal you would find being served in an ISKCON temple - a simple yet fulfilling taste.
It is great for days when your tummy wants something soothing and light, or you were planning on making dal but ran out of onions and tomatoes. Also, it is a great soup for toddlers. My two-year-old loved this soup and asked for more. Now, what more can a mother ask for?
Disclaimer: Approximate Nutritional information is provided as a courtesy and can vary depending on the exact ingredients/brands used. If you have health issues, please work with a registered dietician or nutritionist.
Make this easy and super yummy chicken soup in less than 30 minutes!

Halloween trick or treating was particularly tricky this year - it was cold, windy and we had to brave hail to make sure the kids could get their fill for candies. Once home, my friend welcomed us with a warm bowl of soup - the best soup I had in a very long time.. It was such a perfect evening - company of friends, kids happy with all their loot and the icing on the cake was - a recipe for the most awesome soup ever!
Note: The coconut milk is totally optional. The first time I made this Chicken soup, I did not use it and the soup came out exceptionally well. The second time I tried a slight variation which was using coconut milk - it gave an interesting spin to this recipe; almost tasted like a Thai soup.
Disclaimer: Approximate Nutritional information is provided as a courtesy and can vary depending on the exact ingredients/brands used. If you have health issues, please work with a registered dietician or nutritionist.
Half fried eggs - This lovely breakfast comes together in about 5 minutes and is a perfect way to start your day.
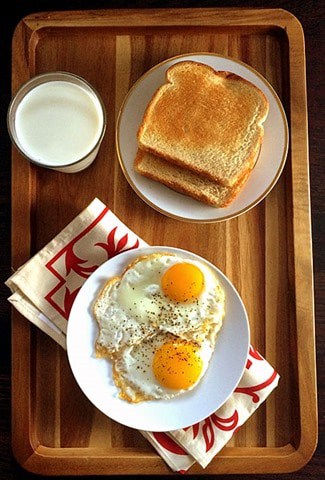
Rise and Shine! This is my go-to breakfast. It instantly makes me happy, fills my tummy and marks the start of a great day. Best part, it is so easy to make. You can’t go wrong with this and it takes like all of 5 minutes to make. Now you don’t have a reason to skip breakfast. If you don’t like the runny center, poke the yolk so that it starts to trickle out and spread and cook it for another 2-3 minutes. Serve hot with toasted bread.
Other ways you can incorporate eggs in your life -
Disclaimer: Approximate Nutritional information is provided as a courtesy and can vary depending on the exact ingredients/brands used. If you have health issues, please work with a registered dietician or nutritionist.
Super easy recipe for Macaroni and Cheese does not require a ton of ingredients, and comes together in less than 30 minutes!
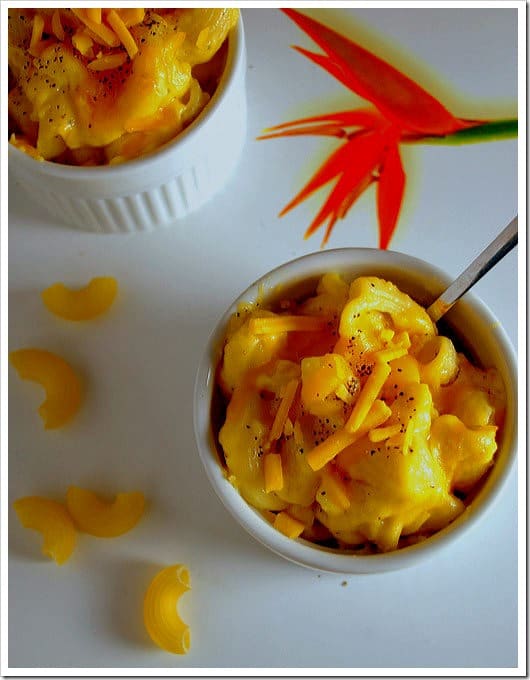
The last time I made Macaroni and Cheese, I followed an elaborate recipe - cooked, baked, and used two different kinds of cheese, but it didn't pass my daughter's muster. When she ate the first bite, she said, ' Umm.. I like it, Mom, but I like the Orange colored Macaroni and Cheese better.
She was referring to the store-bought Mac and Cheese box, which comes with an orange-colored cheese powder..SIGH. This was a year ago.
Yesterday, I decided to make it again but did not follow any particular recipe. The goal was to make it easy to prepare this dish in a jiffy and with just a few ingredients. When I made it this time, my daughter was surprised that it got done so quickly. She rushed to taste it but didn't say anything this time except to give me a thumbs up between bites.
Disclaimer: Approximate Nutritional information is provided as a courtesy and can vary depending on the exact ingredients/brands used. If you have health issues, please work with a registered dietician or nutritionist.