
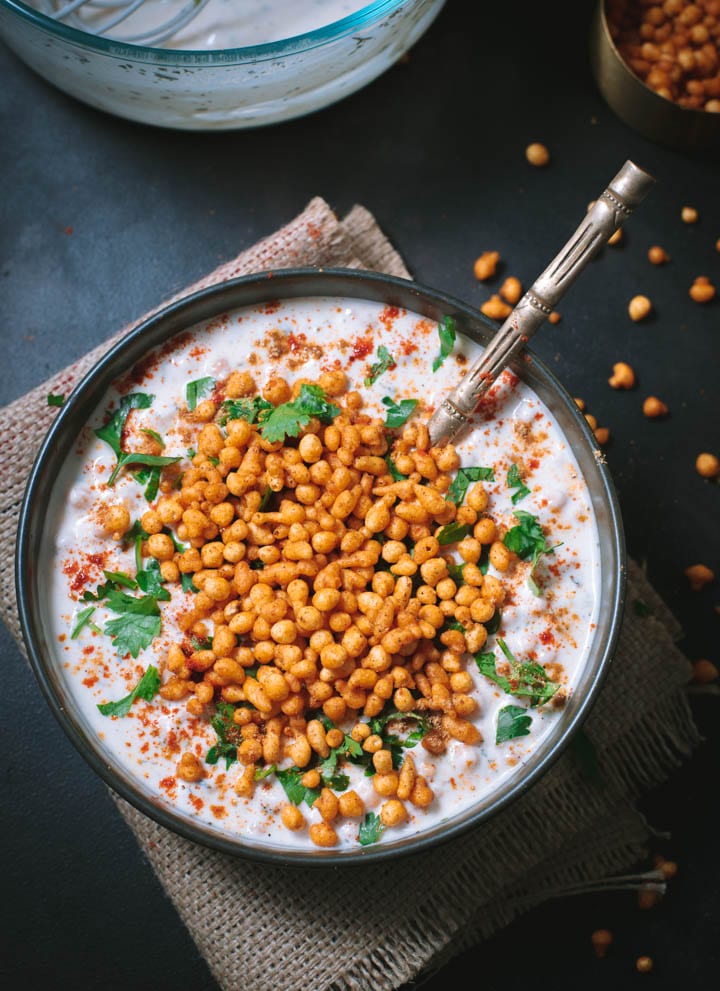
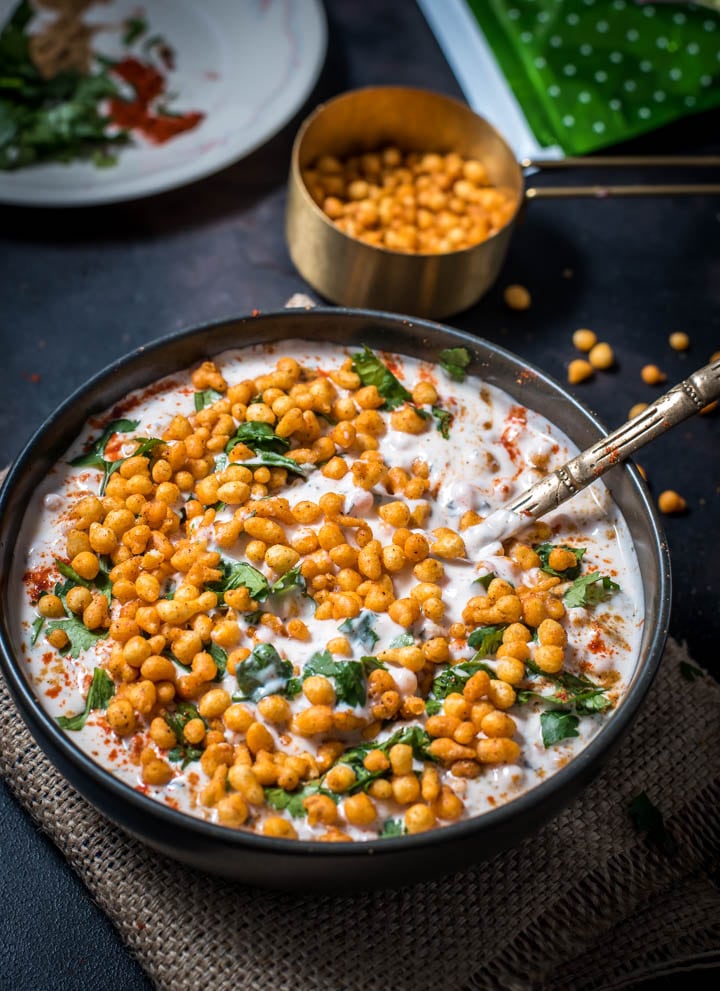
Boondi raita is a cooling side dish that combines crispy boondi (chickpea flour balls) with lightly spiced, creamy yogurt. It's the perfect complement to biryanis and curries, adding a touch of warmth and flavor to round off your meal beautifully.
Want to save this post for later?
What is boondi?
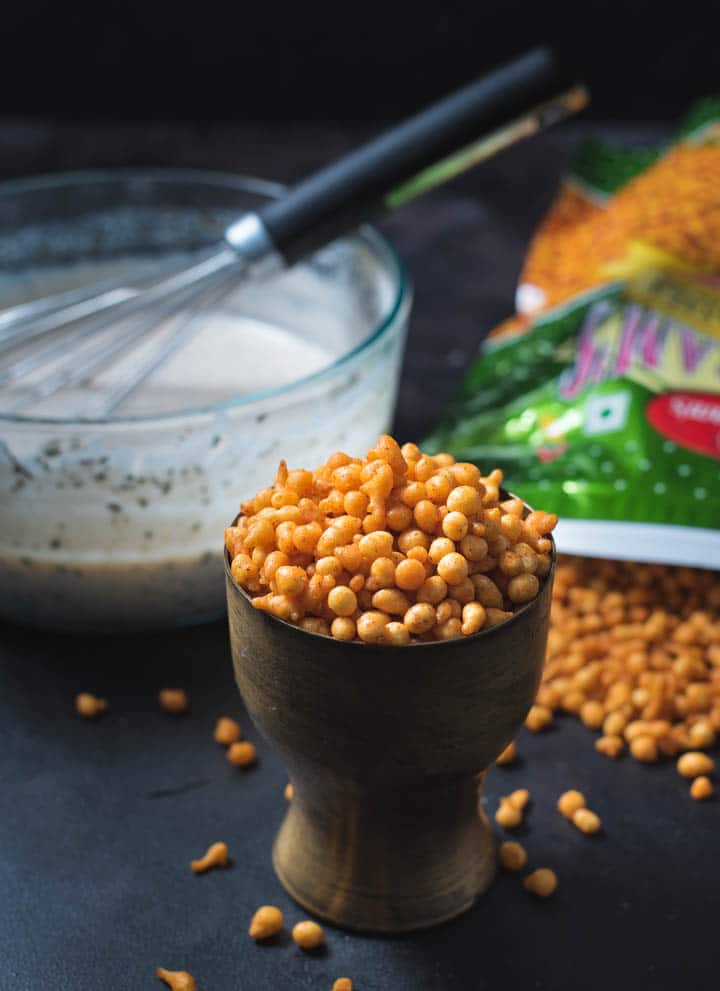
The term "boondi" comes from "boond," the Hindi word for droplet, aptly named for its resemblance to tiny, crispy, hollow droplets crafted from chickpea flour (Besan). Boondi is available in two varieties: a sweet one, often used in making laddoos, and a savory version, the key ingredient in Boondi raitas.
How to make boondi
To make boondis, you start with a simple mix of chickpea flour and water to create a smooth batter. Add salt for flavor and a pinch of chili powder for a savory twist. Want them sweet? Stir in some saffron for a lovely golden hue.
Next, gently pour the batter through a perforated ladle held over hot oil, creating tiny droplets. Deep-fry these until crispy. For sweet boondis, there's an extra step: soaking them in sugar syrup to infuse sweetness.
Storebought boondi - which kind to buy?
You can make boondi at home, but for a quick and tasty boondi raita, store-bought boondi is a fantastic shortcut. When shopping in an Indian grocery store, you'll notice two types of savory boondi: the classic plain one, lightly salted, and the zesty masala boondi.
Most folks prefer plain boondi for their raita, but why not try the masala variety? When using masala boondi, adjust the spices to ensure the raita's flavors are balanced.
A little tip: Try to grab boondi packets that are fresh off the shelves, ideally manufactured within the past few months. They might not taste as good if they've been sitting there for over six months.
How to make boondi raita
Ingredient notes/swaps
- Boondi (plain or masala) - Store-bought boondi is a great shortcut, available in plain (lightly salted) or masala (zesty) varieties. Most people prefer plain boondi, but mixing in masala boondi can add a fun twist. You can easily find packets of boondi in Indian stores or on Amazon.
- Whole milk yogurt or fresh homemade curd - Use full-fat yogurt for a creamy and rich texture. It's the base of our dish and essential for the authentic taste.
- Whole milk - Enhances the creaminess and consistency of the yogurt mix. Also used to dilute the raita to achieve the right consistency.
- Red chili powder - Adds a spicy kick. Adjust the quantity based on your spice preference. You can also substitute chili powder with finely chopped green chillies or black pepper powder.
- Salt - Balances the flavors and is a must-have for seasoning.
- Dried mint leaves - Brings a refreshing and aromatic touch. Crush them slightly before adding.
- Sugar - Balances the tanginess of the yogurt.
- Chaat masala - This spice blend gives the dish a tangy, zesty flavor. You can either use homemade chaat masala or storebought.
- Cilantro or coriander leaves - Freshly chopped for garnish. It adds a burst of color and fresh flavor.
Be sure to check out the full recipe and ingredient list below.
Step-by-step instructions
- To make boondi raita, add milk, salt, chaat masala, chili powder, sugar, and crushed dried mint leaves into yogurt. Whisk until the yogurt is smooth, creamy, and flowing in consistency.
- For plain boondi, let it soak in warm water for about 5 minutes, then gently squeeze out the water. Skip this step for masala boondi.
- Add the drained boondi into the yogurt mix. Stir thoroughly.
- Chill in the refrigerator for an hour before serving to enjoy it cold.
Testers notes
- Using milk: Adding milk to this raita serves a dual purpose: it cuts through the yogurt's sourness and helps achieve a smooth, flowy consistency. If you prefer Greek yogurt instead of regular, increase the quantity of milk or water to reach the desired texture.
- Soaking boondi: Soaking boondi in warm water helps remove excess oil and softens them. Prefer a crunchier bite in your raita? Go ahead and add the boondis directly to the yogurt without soaking. This additional step of soaking is usually done only for plain boondis, not masala ones.
Variations
- Masala or khara boondi: You can use masala or khara (spicy) boondi instead of plain boondi. Masala boondi is already spicy, so reduce the amount of chili powder accordingly.
- Black salt (kala namak): Replace chaat masala with black salt. Don't use both - it's an overkill.
- Roasted cumin powder: If you have roasted cumin powder (storebought or homemade), add ½ a teaspoon to amplify the flavor.
- Fresh mint leaves: Use fresh mint leaves instead of dried ones for a more vibrant taste.
Serving suggestions
Serve this easy boondi raita alongside rice dishes such as biryani, pulao, or any spicy Indian meal to cool off the palate.


How to prep ahead
Preparing the yogurt base for boondi raita in advance saves time. Mix yogurt, milk, salt, chaat masala, chili powder, sugar, and dried mint leaves. Whisk until smooth and creamy, then refrigerate. You can make it 3-4 days ahead, simplifying your meal prep.
How to store
- Short-term storage: Refrigerate the raita in an airtight container once the boondi has been mixed into the spiced yogurt. For the best taste and texture, consume within 1-2 days.
- Avoid freezing: Freezing boondi raita is not recommended as it can affect the texture of the yogurt and boondi, leading to a less pleasant eating experience upon thawing.
- Stir before serving: If the raita has been sitting in the fridge, stir it before serving. This helps to redistribute the flavors and ensure a creamy consistency.
Other raita recipes you'll love
Here are a few more raita recipe ideas that I am sure you'll love. Alternatively, click the following link to find a collection of 10+ raita recipes - some classics, a few new, and some with a twist.
- Cucumber raita recipe - A refreshing mix of grated cucumber and yogurt, perfect with any Indian meal.
- Pineapple raita - Enjoy it as a dessert or pair it with biryanis - it's delicious either way.
- Cucumber tomato raita - A simple raita made from everyday pantry ingredients.
- Onion raita - Craving raita with your biryani? This popular restaurant-style onion raita recipe is ready in less than 5 minutes - try it today!
- Mango raita - Love mangoes? This mango raita is perfect as a dessert or a side dish with a spicy Indian meal.
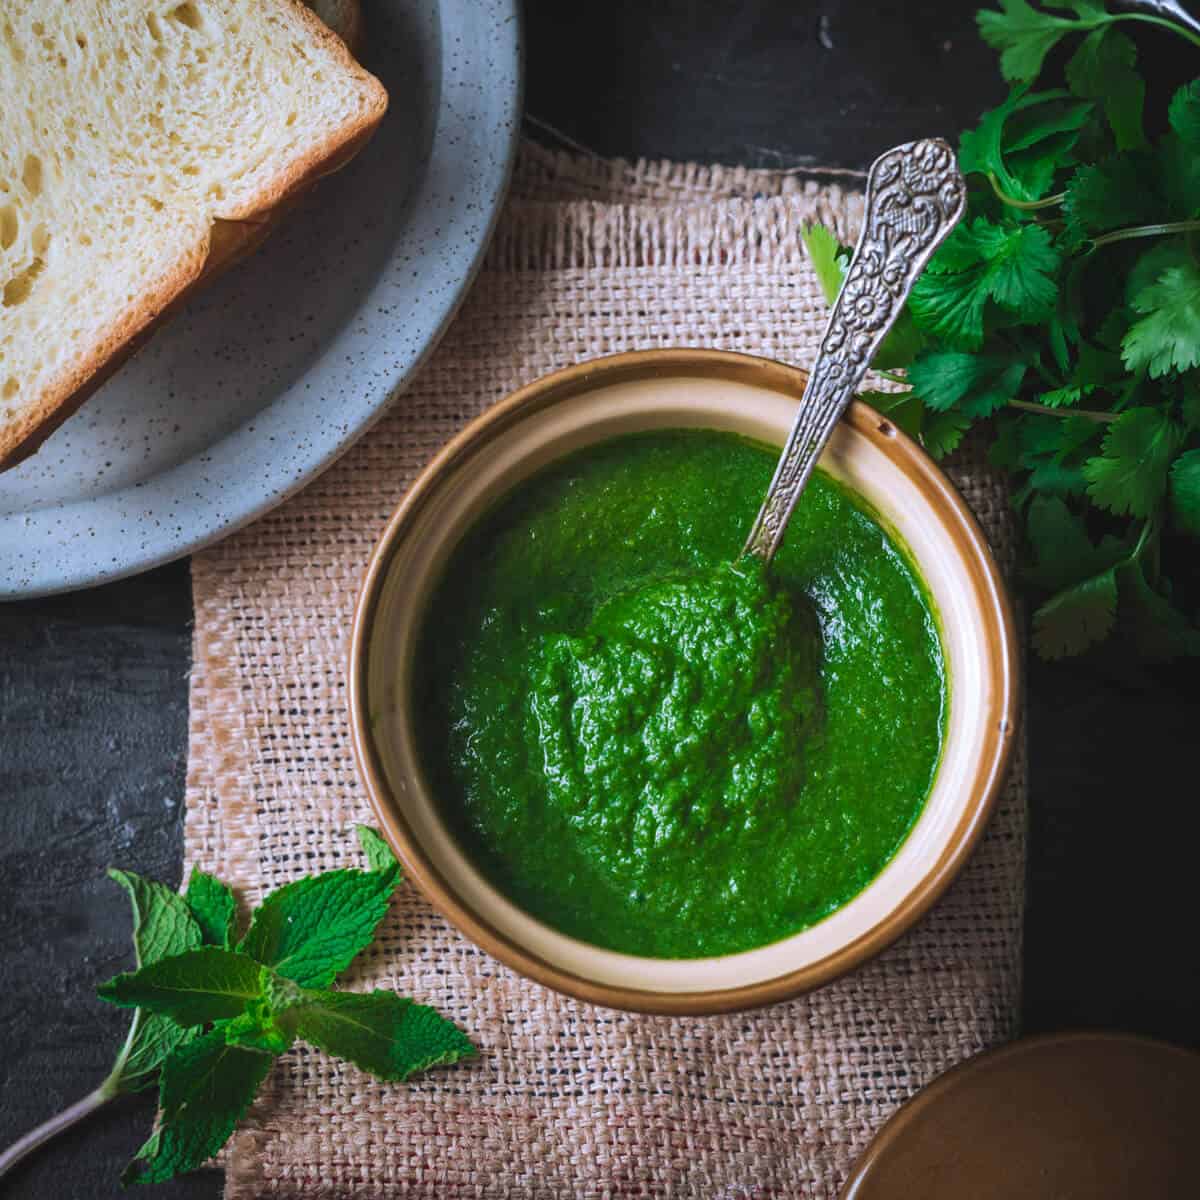
- Mint Raita - This refreshing yogurt-based dip made from mint is perfect with biryanis, parathas, and grilled Indian foods. All you need is 5 minutes!
📖 Recipe
Want to save this post for later?

Boondi Raita Recipe
Ingredients
- 2 cups whole milk yogurt
- ¼ cup whole milk
- ½ teaspoon chili powder
- ½ teaspoon salt
- 2 teaspoons dried mint leaves
- 1 teaspoon sugar
- 1 teaspoon chaat masala
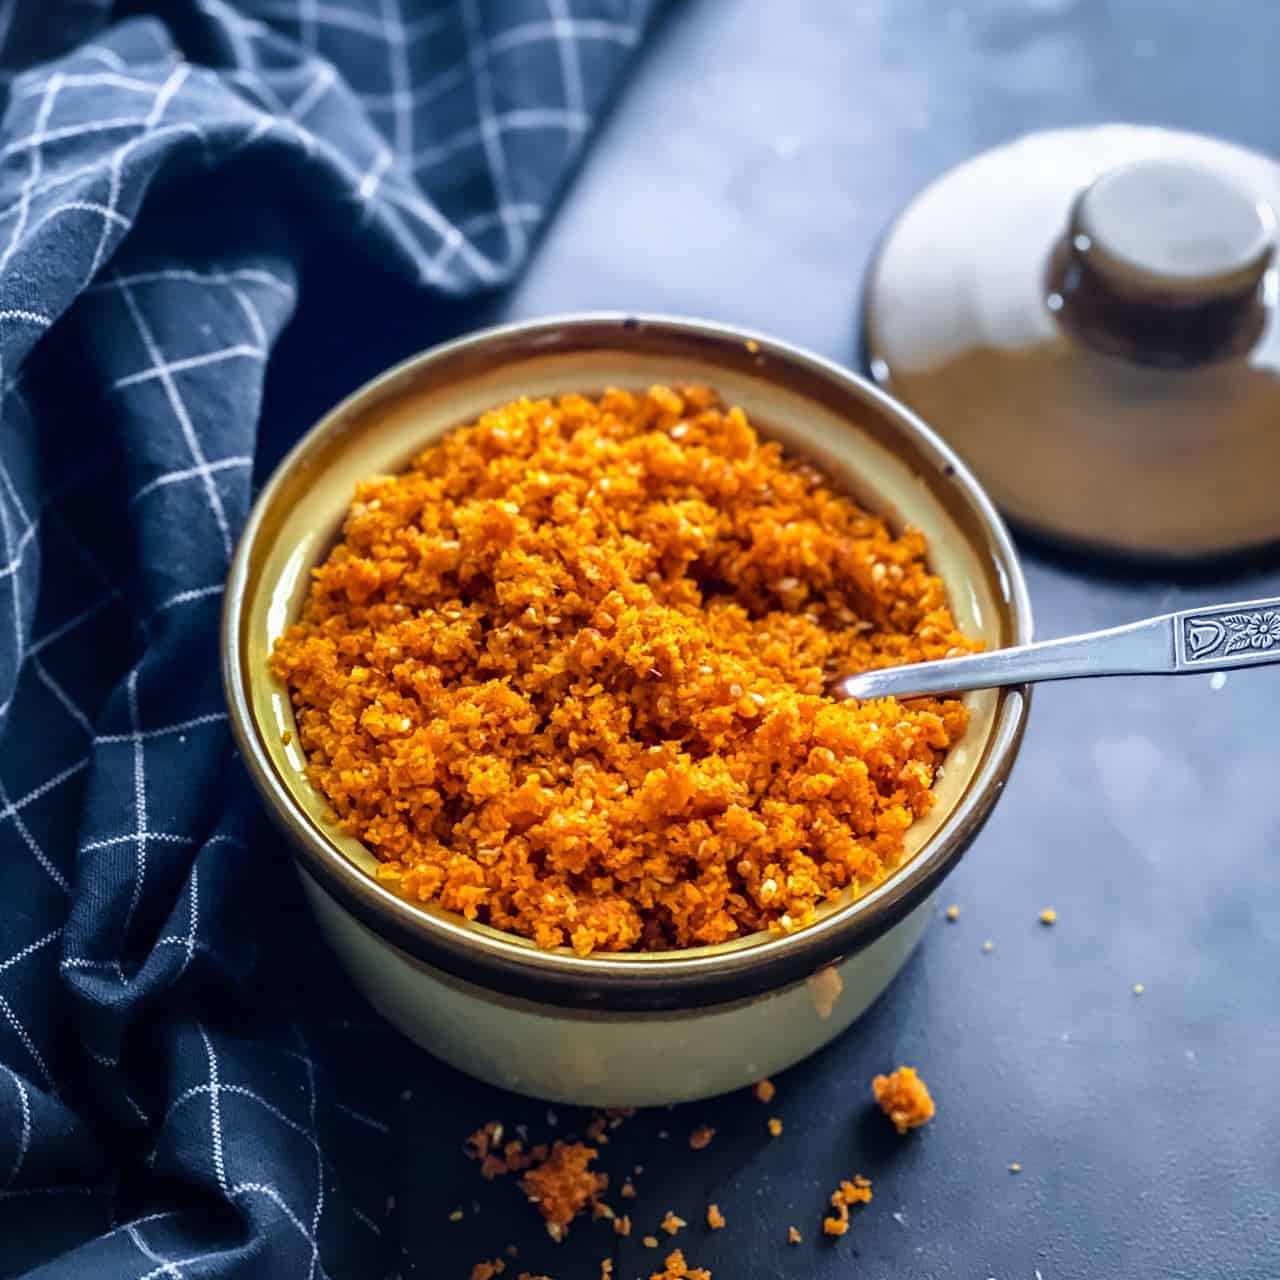
- 1 cup boondi plain or spicy [see note 2]
- ¼ cup finely chopped cilantro
Instructions
- Add yogurt to a medium-sized bowl followed by milk, salt, chaat masala, chili powder, sugar, and dried mint leaves. Note: For a smooth texture, crush the dried mint leaves between your fingers before adding to the yogurt.
- Whisk until the yogurt-milk mixture is smooth, creamy, and has a flowing consistency.
- Follow this step for plain boondi only - Soak the boondi in warm water for about 5 minutes and then squeeze them gently to remove the water.
- Add boondi along with finely chopped cilantro to the yogurt mixture. Mix well.
- Refrigerate for an hour. Serve chilled.
Notes
- Using milk: Adding milk to this raita serves a dual purpose: it cuts through the yogurt's sourness and helps achieve a smooth, flowy consistency. If you prefer Greek yogurt instead of regular, increase the amount of milk or water to reach the desired texture.
- Soaking boondi: Soaking boondi in warm water helps remove excess oil and softens them. Prefer a crunchier bite in your raita? Go ahead and add the boondis directly to the yogurt without soaking. This step is usually done only for plain boondis, not masala ones.
Variations
-
- Masala or khara boondi: You can use masala or khara (spicy) boondi instead of plain boondi. Masala boondi is already spicy, so reduce the amount of chili powder accordingly.
-
- Black salt (kala namak): Replace chaat masala with black salt. Don't use both - it's an overkill.
-
- Roasted cumin powder: If you have roasted cumin powder handy, add ½ a teaspoon to amplify the flavor.
-
- Fresh mint leaves: Use fresh mint leaves instead of dried ones for a more vibrant taste.
Disclaimer: Approximate nutritional information is provided as a courtesy and can vary depending on the exact ingredients/brands used. If you have health issues, please work with a registered dietician or nutritionist.
Nutrition
This post was first published on April 16, 2019, and updated with new text and pictures on July 17, 2024.


Comments
No Comments